Every Screen in Your App Should Be a Scrolling View
Yes, really

In this blog post, I’m going to tell you why every major screen in your application should be embedded in a scrolling view.
Wait, what? Not everything in my application needs to scroll! I used to agree with you—but I’ve learned over the past five years that that‘s almost always the wrong assumption.
I’m going to highlight why almost every screen in your app should be embedded in something like UIKit’sUIScrollView, UITableView, or UICollectionView; or SwiftUI’sScrollView, List, or Form .
What is a “screen”?
Screens are what a user sees on their device. They are high level containers that contain various UI elements related to a specific task. In an app like Slack, each of the tabs on the tab bar is a screen—as well as each channel you open.
To oversimplify it from a code standpoint, most UIViewControllers represent the screens of your app. In SwiftUI, it’s harder to draw a destination. Views can be a container for the whole screen while also being made up of smaller Views, like a LoginView having a TextField view.
What are some parts of an app that may not scroll?
I’ve found that most developers don’t naturally set up screens like onboarding, login, and signup to scroll. I think this is mainly because these screens tend to have pretty simple UI with minimal content.
Now, let’s look at three main reasons why these screens should scroll—even though they may not look like they need to.
Keyboard
In the case of screens like login and signup, you’ll often have to deal with the keyboard being on screen. The user should be able to interact with the content while having the keyboard up. Being in a scroll view allows you to adjust the content inset or have it automatically handled depending on what implementation you picked.
Device Size
As Apple continues to introduce new device designs with various screen sizes, it’s hard to design a screen that fits and looks good on both an iPhone 13 Pro Max and an iPhone 13 Mini. Being in a scroll view gives you the flexibility to keep your preferred design for the larger devices, and instead of making a custom one for smaller devices, it can scroll when it needs to.
Dynamic Type
Accessibility shouldn’t be optional, so your app should support Dynamic Type throughout the interface. Woah there, that sounds like a lot of work!
If you architect all your screens to be in scrolling views, a majority of the work to support Dynamic Type is already done. As the user adjusts the type size to fit their needs, the view can shrink and grow, allowing itself to scroll if you run out of space.
Example
Now that you know why a simple screen should scroll, I’ll walk you through an example of taking a basic sign up screen and allowing it to scroll if needed.
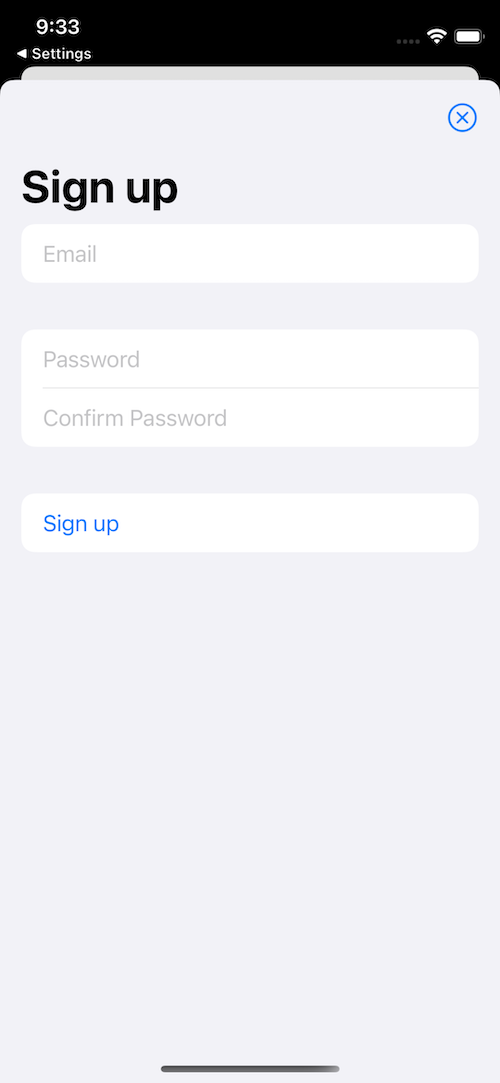
Here, you have a view for signing up. There are text fields for email, password, and password confirmation. There is also a sign up button.
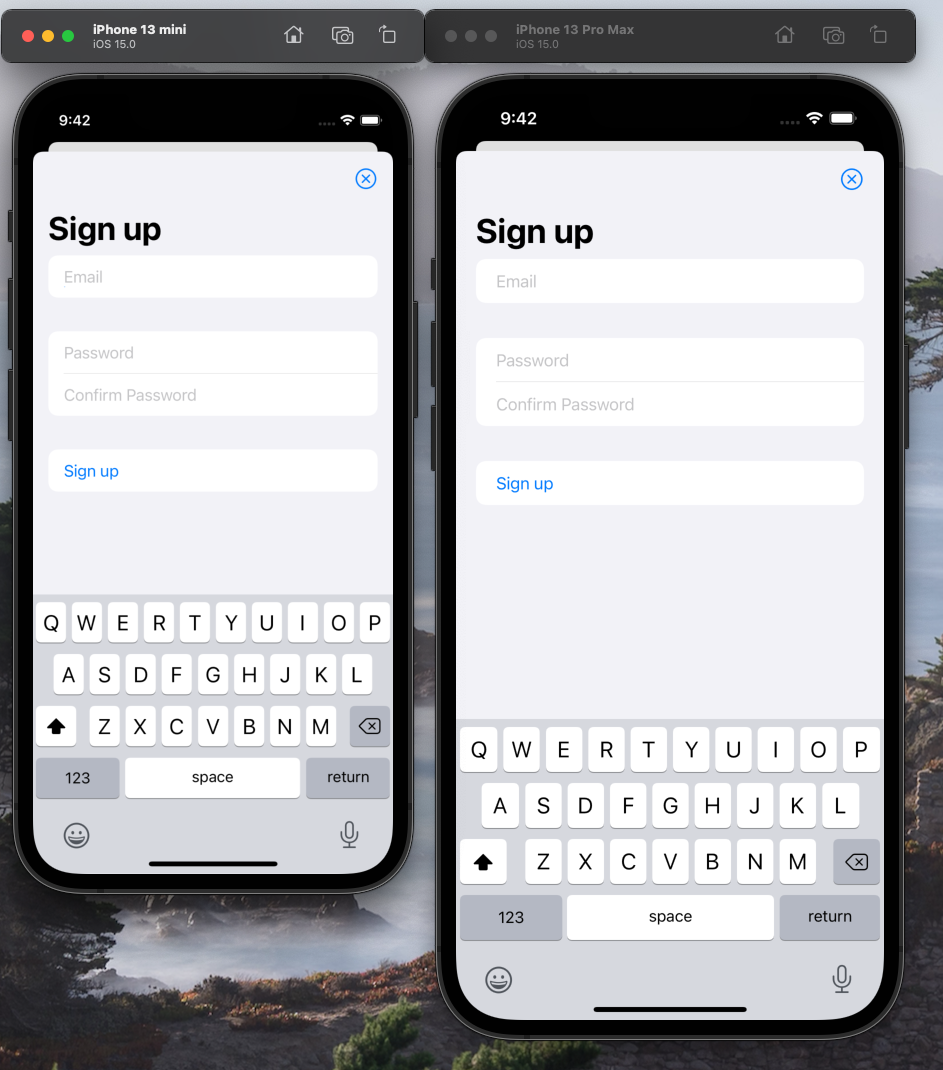
At first glance, you might consider building this with a UIStackView that has a couple UITextFields and a UIButton. Alternatively, in SwiftUI, you may build it with a VStack that includes a few TextFields and a Button. Here’s what it looks like on an iPhone 13 Pro Max vs. iPhone 13 Mini with an increased Dynamic Text size:
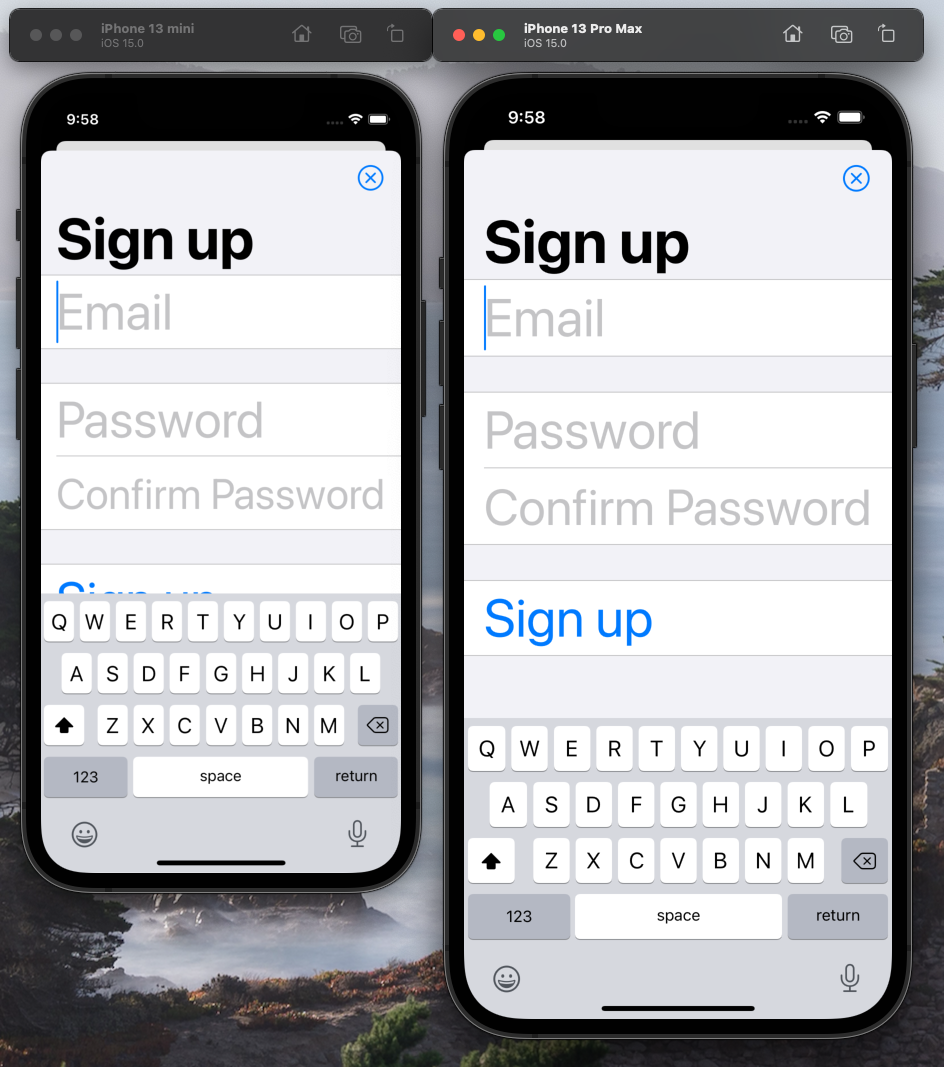
We’ve got a problem!
UIKit
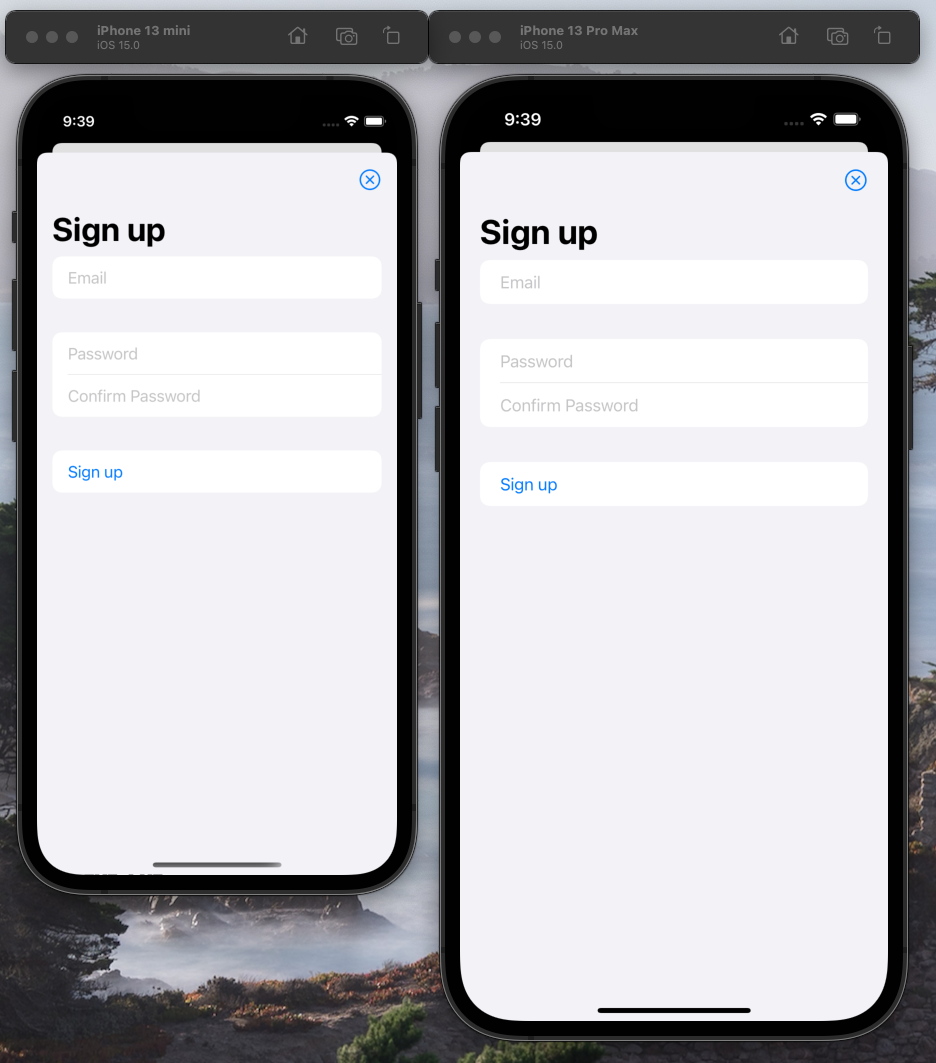
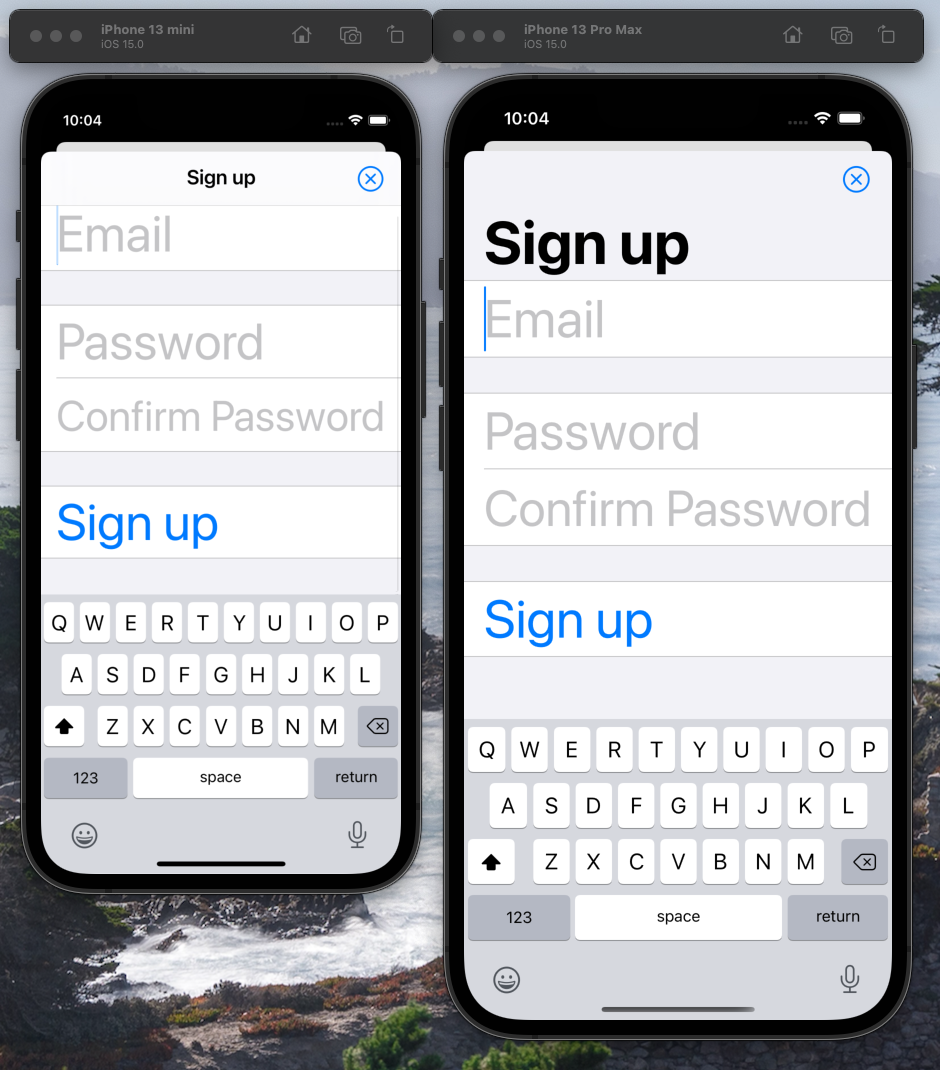
You could convert this view over to using UITableView or UICollectionView but the content isn’t really being reused, which is one of the main benefits of those classes. I’d like it to scroll, but I don’t need all those optimizations. That’s where you can use good old UIScrollView. You can embed your UIStackView in a UIScrollView, and you’re already almost finished with supporting Dynamic Type in this screen.
Xcode has added the Content Layout Guide and Frame Layout Guide when constraining UIScrollViews in iOS 11+. You can constrain the content, the UIStackView, to the contentLayoutGuide top, bottom, leading, and trailing to define the scrollable area. You can then constrain the UIStackView ’s width to the frameLayoutGuide so that it only scrolls vertically. That’s it—your content can now scroll as it shrinks or grows!
SwiftUI
Depending on the styling of the screen and what version of SwiftUI you are using, you could potentially build this with a Form. You can then place the few TextFields and a Button in it. That’s it—your content can now scroll as it shrinks or grows!
Recap
Even the simplest screens in an app should be architected to allow for scrolling. That way, you generally don’t have to think about supporting the keyboard, different device sizes, or Dynamic Type. Your screens become more flexible and can continue to work as they change over the lifetime of the app. Making every single screen in your app scrollable will benefit you and your users—I hope I’ve convinced you to give it a try!