GitHub Markdown Shortcuts
Streamlining our pull requests

This summer, Lickability held a brief retreat where engineers hacked together a few projects to scratch itches, learn new technologies, and work together. I took the opportunity to make a few shortcuts (that is, referring to Apple’s Shortcuts app) to boost productivity around my favorite thing: pull requests!
If you’ve been reading our blog for a while, you’ll already know I feel strongly about good pull request descriptions, and making things easier for reviewers. So while others toiled away in Swift, I got to work on three new shortcuts that our team has since worked into their daily routines. Before we get to those, a little history…
Baby’s First Shortcut
For as long as I‘ve been using GitHub, I’ve had a pet peeve about how enormously iPhone screenshots are rendered by default when attaching them to pull requests and issues. Sure, the screenshots are saved @2x, but that effectively results in double-sized images, massively interrupting the flow of text.
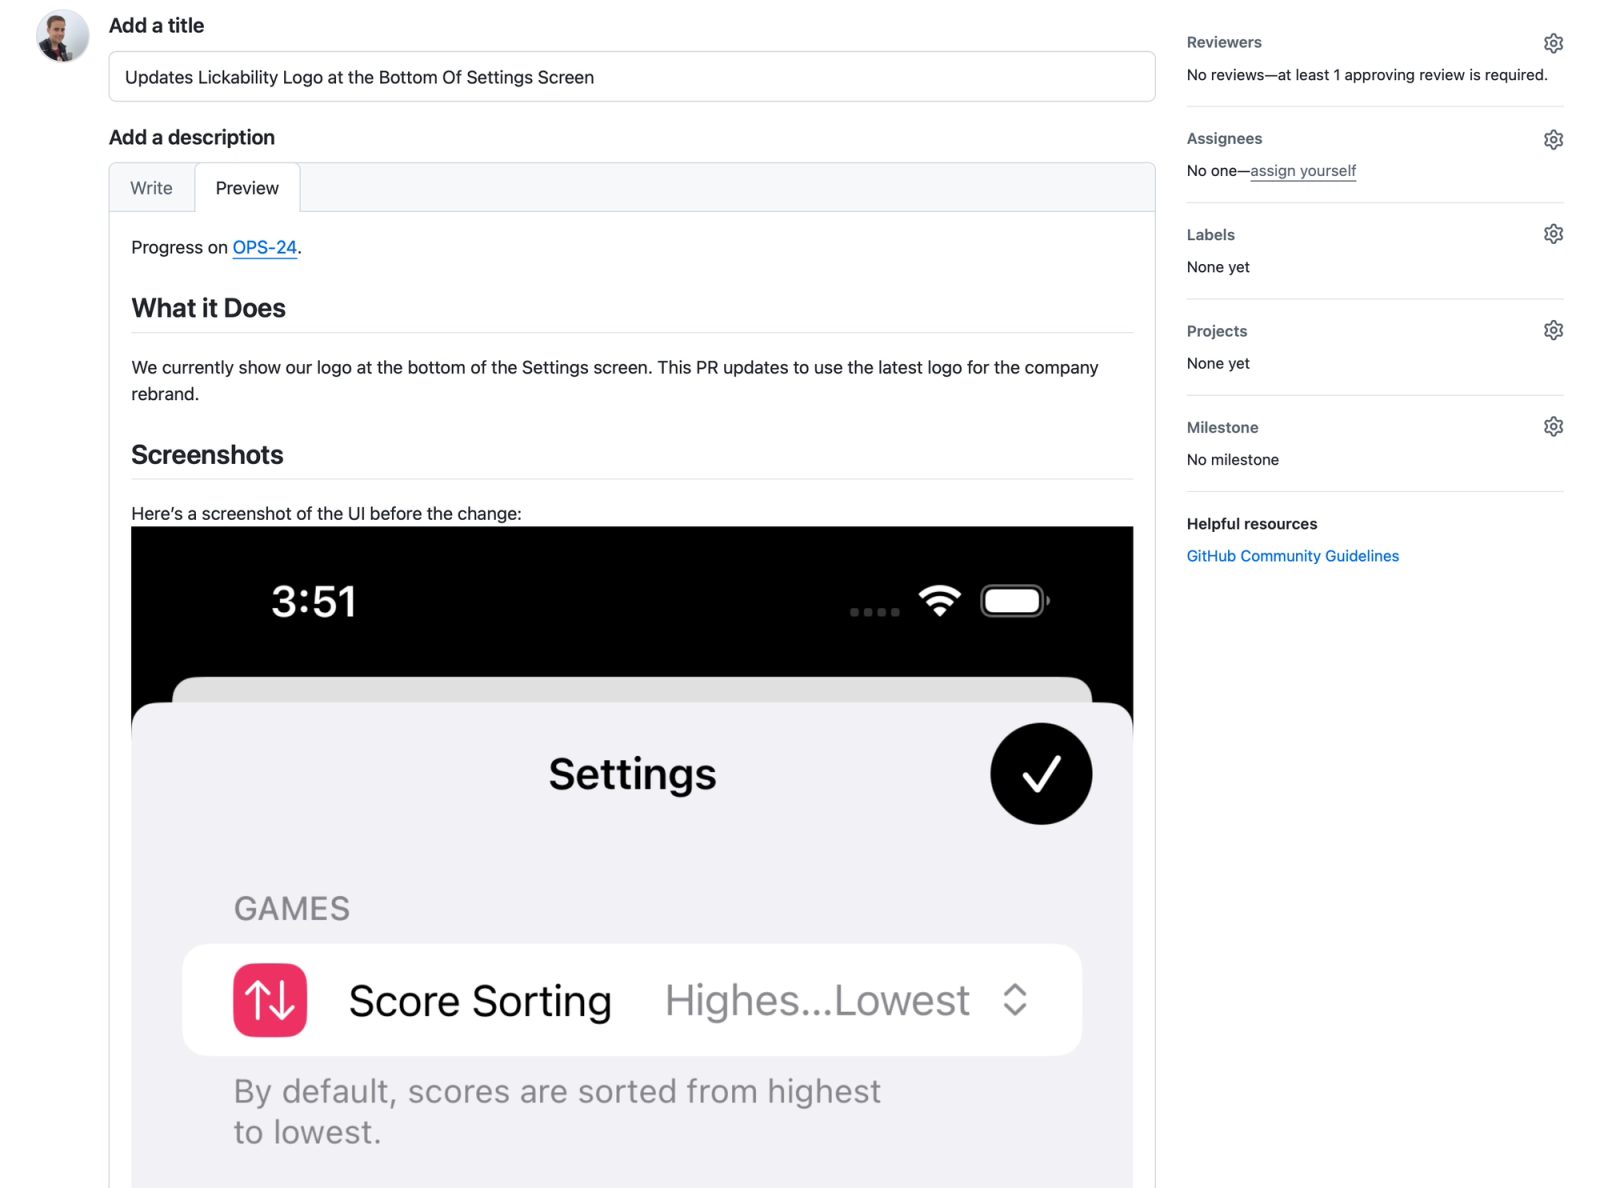
Over the years, I developed various strategies to combat this, including automated scripts that resized iPhone screenshots that were saved to my Desktop, but I was never happy with destroying the quality of images when in many cases the screenshots were used to highlight tweaks in designs that would benefit from pixel perfection. I sought a more robust approach. A few years back, dropping a screenshot into GitHub looked something like this:
While we can’t specify a size in Markdown syntax directly, using absolute-beginner HTML, we can easily render the image at that URL at a more appropriate size using an img tag, since after all:
For any markup that is not covered by Markdown’s syntax, you simply use HTML itself. There’s no need to preface it or delimit it to indicate that you’re switching from Markdown to HTML; you just use the tags.
So with a very basic text transformation, we can limit the width of the rendered image within a pull request description or issue, maintaining the aspect ratio:
<img src="https://github.com/user-attachments/assets/c47aec88-87cc-4f8a-9a40-ba281d951e0b" width="300" />I use a width of 300 for iPhone screenshots, regardless of device size, as I find it to be a nice balance between legibility within the image and not being too disruptive to surrounding text.
But you said you weren’t happy with destroying the quality of images! That’s right, straw man. The benefit of this approach is that the image quality is preserved, and the full-size image just a click or two away in your browser.
But isn’t that cumbersome to do for every image? Sure is, but like any engineer, I saw that as an opportunity to automate away the tedium of text transformation. With a bit of free time, I decided to dip my toes into Shortcuts to tackle this since, at the time, it was relatively new on Mac, and I wanted an excuse to try it out. Not long after, I had a working shortcut that could handle the resizing task with ease, conveniently located in the Services and right-click menus, even tackling multiple images at once!
Pretty nifty! If you think you‘d benefit from this, you can grab the shortcut from the link at the bottom of this post.
GitHub has since changed how it processes image uploads, and more conveniently provides an img tag on upload:
<img width="1179" height="2556" alt="Simulator Screenshot - iPhone 16 - 2025-09-09 at 15 57 27" src="https://github.com/user-attachments/assets/830ef400-8619-49a6-86e2-536690ac2d9b" />So despite this being a convenient shortcut for years, it’s now much simpler to just delete the height parameter, and restrict the width parameter to a value of your choosing. Small bummer for my shortcut’s usefulness, but that’s a win for everyone. I still use the shortcut to this day, as I find it convenient to resize many images at once, but I do appreciate GitHub’s constant improvements to the text editing experience.
The New Shortcuts
In the intervening years, I noticed some tedious patterns creeping in, ultimately requiring me to take extra time to communicate my thoughts in pull request descriptions. I had been saving up some ideas for the next hackathon-style work event, and our retreat this summer gave me the opportunity I needed. In an afternoon, I created the shortcuts that follow, and I’ve been saving lots of time ever since!
Arranging Related Screenshots in Tables
I love Markdown tables for neatly organizing data. Historically, though, they’ve been a bit of a pain to type up manually, often requiring switching between Write and Preview modes to ensure you’ve got the syntax just right. Fortunately, GitHub recently introduced slash commands, including /table, which allows you to specify the number of columns and rows, giving you a great starting point to fill in your relevant data.
When writing PR descriptions, I‘ll often include multiple screenshots, sometimes “Before and After” comparisons, and in the spirit of not disrupting the surrounding text too much, I like to arrange these side-by-side. Using the /table slash command to neatly package the screenshots together is nice, but still requires a fair bit of manual manipulation, especially when resizing the images is also necessary. So I thought, why not create a shortcut to do all of the heavy lifting?
Now, with a single activation of my “Make GitHub Image Markdown Table” shortcut, I can take multiple screenshots, specify column headers, and arrange them in a beautiful table in seconds. I’ve even built in some conveniences, including a “Before and After” option that’s offered when exactly two screenshots are selected. And to build off of my first shortcut, image resizing is built in by default.

Wrap Details in a Toggle
Have a lot of optional background context to write? Screenshots and videos still taking up too much space, distracting from the main points you’re trying to get across? No problem. You can easily hide additional details behind a heading with a toggle used to show/hide your more verbose context.
This is accomplished purely with HTML tags, like the following:
<details>
    <summary>The boring details…</summary>
    <p>Lorem ipsum dolor sit amet, consectetur adipiscing elit, sed do eiusmod tempor incididunt ut labore et dolore magna aliqua. Ut enim ad minim veniam, quis nostrud exercitation ullamco laboris nisi ut aliquip ex ea commodo consequat. Duis aute irure dolor in reprehenderit in voluptate velit esse cillum dolore eu fugiat nulla pariatur.</p>
</details> 
While there’s a newly introduced /details slash command for this as well, I much prefer interacting with a lightweight UI over editing the text between HTML tags, if I can help it. Enter my “Wrap in Toggle” shortcut to save the day:
Wrap in Callout
If I had a nickel for every time another engineer looked at a neatly formatted callout in a PR description of mine and said “how’d you do that??,” I’d have… some nickels.
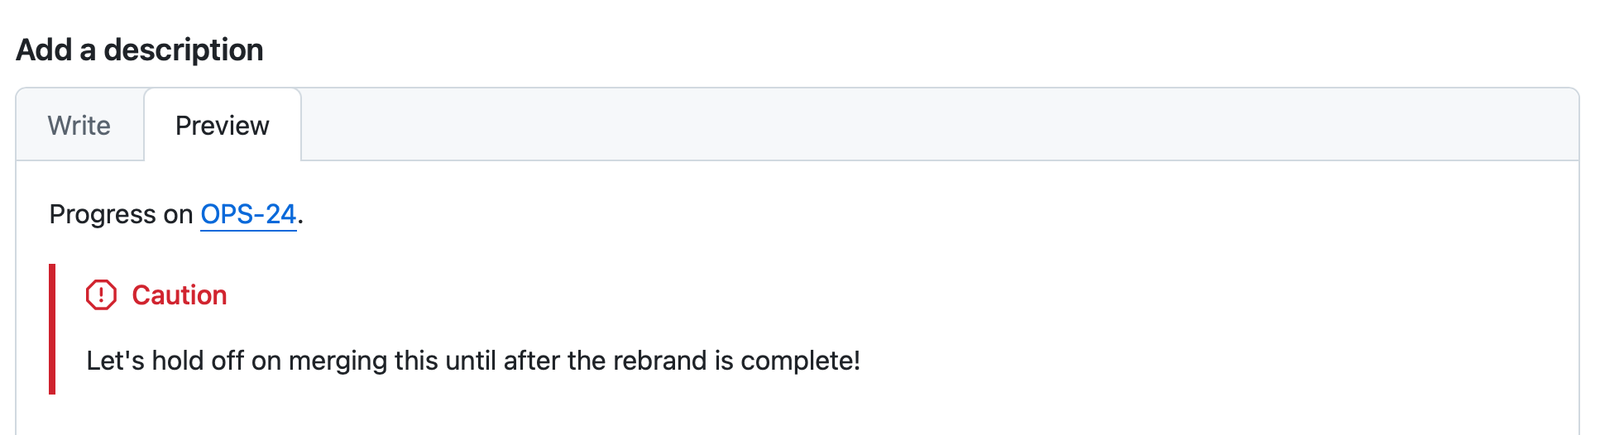
I’ve had this page bookmarked for a couple years, as I often forget the exact syntax and need a refresher. To streamline this — you guessed it — I created a “Wrap in Callout” shortcut. You know the drill by now: write some text, select it, run the shortcut, DONE.
Admittedly, GitHub pretty much steals all the thunder on this one with a new /alerts slash command, but I like the convenience of having all of my text manipulation shortcuts in one spot, and being able think text-first before deciding to move something into a callout / alert.
Just Give Me The Shortcuts!
Here they are:
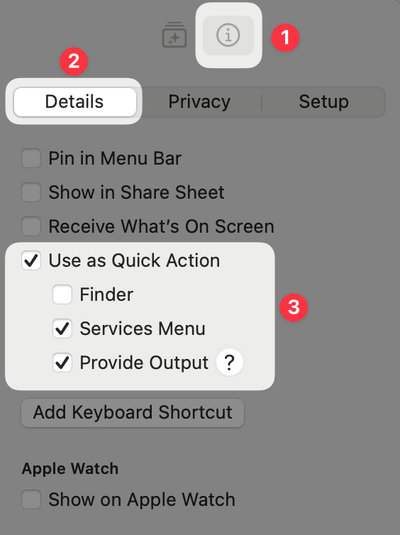
To add them to the Services and right-click menus, open each shortcut, select the Shortcut Details inspector panel (1), the Details tab (2), and check Use as Quick Action, Services Menu, and Provide Output (3). You could also assign a keyboard shortcut if that’s more your style.
By all means, please let us know if you find these useful in your day-to-day GitHub adventures. Feel free to edit them, share them, or suggest improvements.