Testing Push Notifications in the iOS Simulator
Never bug a server engineer again

With the release of Xcode 11.4, Apple has given us the ability to test push notifications in the simulator. Before this, testing push notifications required using a physical device and a lot of extra work. In this post, we are going to go over a few of the ways you can test push notifications on your simulator without ever having to involve an actual device, starting with the simplest path and looking at tools for more advanced uses toward the end.
Initial Setup
In order for any of this to work, you have to do some minor preparation. For starters, make sure you have Xcode 11.4 installed. At the time of writing this post, Xcode 11.4 beta 3 was recently released. Everything that I will display and test will be based on that version of Xcode. For more information on what’s available, check out the release notes here.
To begin, launch Xcode and create a new project called PushTest. It doesn’t matter if the project is based on SwiftUI or a storyboard, but I chose to use a storyboard for this example.
Once you have created the app, go to your AppDelegate.swift file. Here, we are going to add the lines of code needed to display notification alerts on our device. First, lets create our UNUserNotificationCenter object. Add this code to your didFinishLaunchingWithOptions method:
let notificationCenter = UNUserNotificationCenter.current()This object was introduced in iOS 10 and is the central object for managing notification-related activities for our app.
Now we need one more line that requests authorization from the user to display our notifications:
notificationCenter.requestAuthorization(options: [.alert, .sound]) { granted, error in
  // handle permissions here
}
Our completed code will look like this:
func application(_ application: UIApplication, didFinishLaunchingWithOptions launchOptions: [UIApplication.LaunchOptionsKey: Any]?) -> Bool {
    // Override point for customization after application launch.

    let notificationCenter = UNUserNotificationCenter.current()
    notificationCenter.requestAuthorization(options: [.alert, .sound]) { granted, error in
        // handle permissions here
    }

    return true
}
With that in place, we have everything we need to start displaying our notifications!
The Simplest Path
Xcode has provided us with some “drag and drop” functionality that should make testing a breeze! Essentially, you can drag an APNS file onto your simulator and trigger a notification that way. The hardest part about that whole process is creating a properly formatted APNS file. For a guide on creating the file, check out the Xcode 11.4 Beta 3 Simulator New Features. For the sake of speed, we are going to create the file using the nano editor, but feel free to create it in your text editor of choice.
Create an APNS file
First, launch the terminal and type the following command:
nano payload.apns
This will create a new file called payload.apns and launch the nano editor. Here are Apple‘s requirements for the file:
The file must be a JSON file with a valid Apple Push Notification Service payload, including the “aps” key. It must also contain a top-level “Simulator Target Bundle” with a string value that matches the target application‘s bundle identifier.
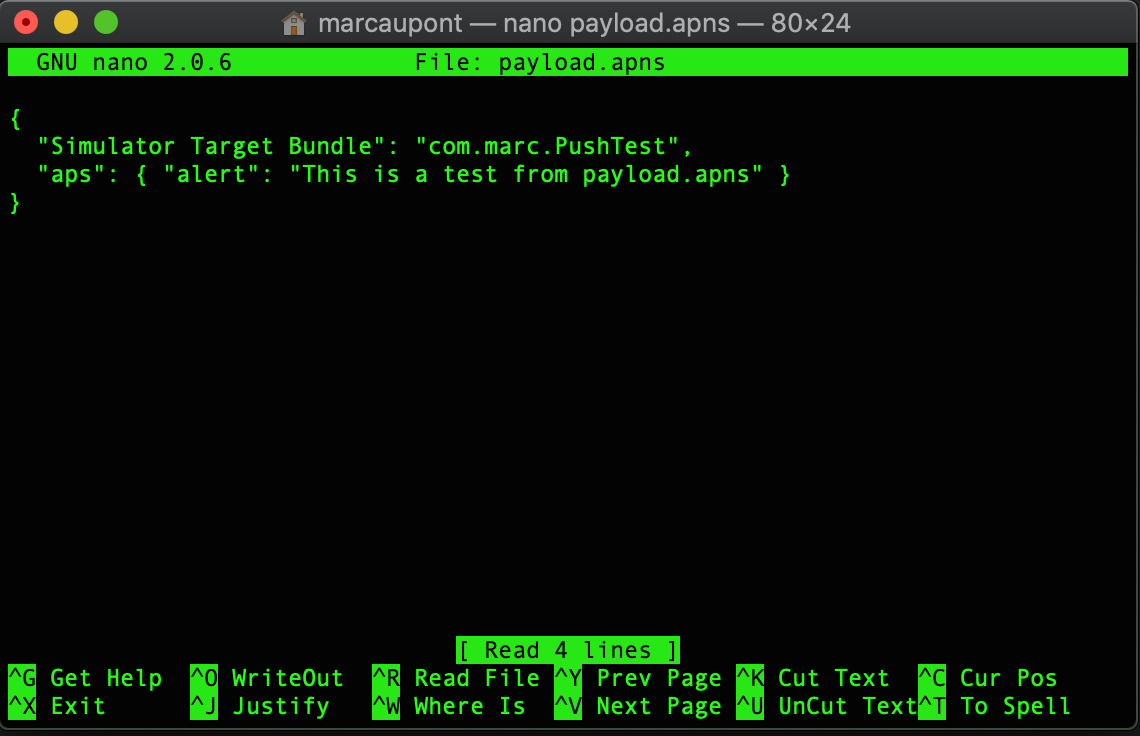
In the screenshot above, you can see that I’ve set my “Simulator Target bundle” to the bundle ID for my app, and set my “aps” key to a very basic payload. For more information on the necessary keys to create a payload, read here.
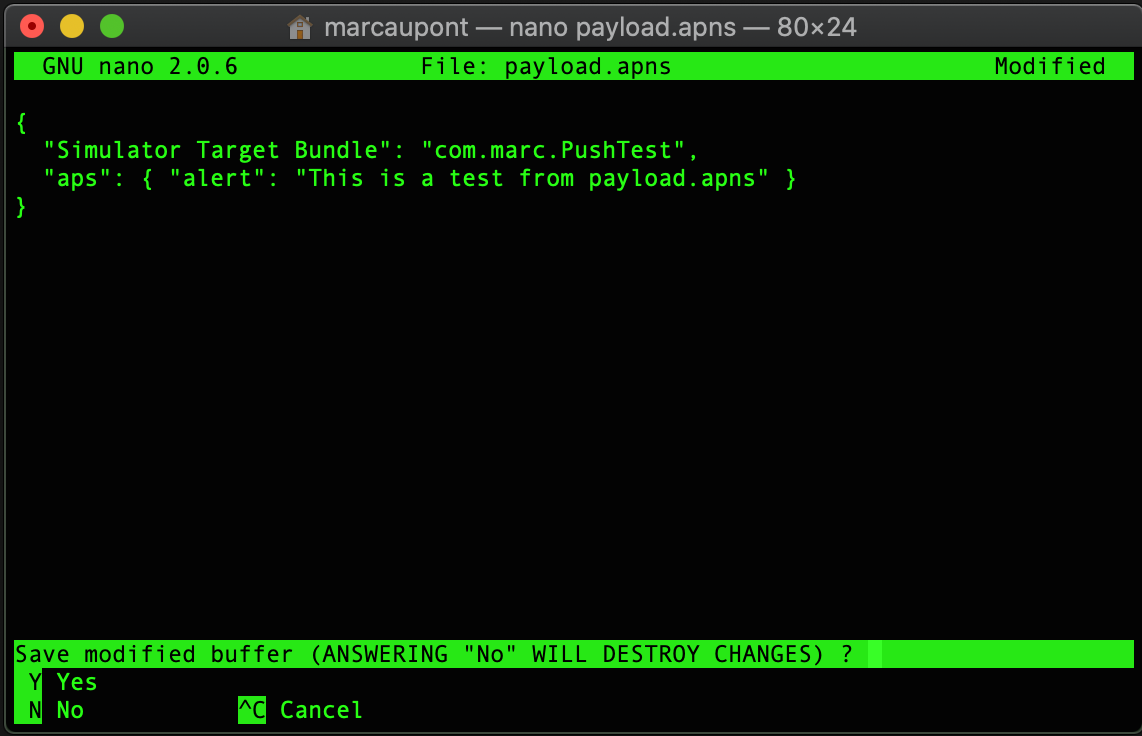
Once you have added the code above press CTRL x on your keyboard to exit the nano editor. When asked if you want to save your changes, press Y to proceed.
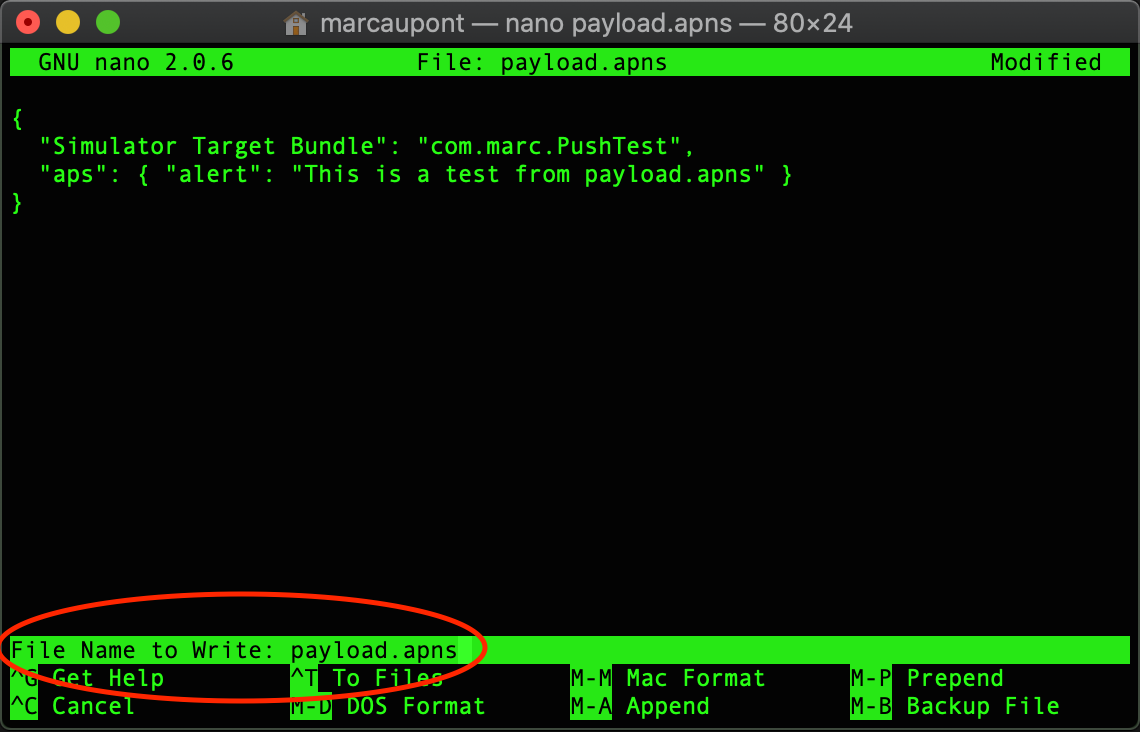
When prompted for the file name you would like to save-as, press enter to continue with the existing file name, which in our case is payload.apns.
🎉 That‘s it! We are now ready to test our remote notification. But first, in order to use this method, there are a few prerequisites:
- You have run your app at least once and selected
Allowfor the push notification permissions. - You have minimized your app to the background—at the moment, we don’t have code in place that would display notifications while our app is in the foreground, so you‘ll need to go to the Home screen.
There you have it! With a simple drag and drop of the payload.apns file into the simulator, the notification alert displays.
Helpful Tools
Up to this point, we’ve been able to test this feature with very little work. The hardest part so far is making sure the formatting is correct for your payload.apns file. Once that is correct, testing a push notification is as simple as dragging the file onto your simulator. However, since the announcement of this feature, there have been a few tools created to help with this process.
Poes
One of those tools is called Poes. Poes is a Swift command-line tool that helps you send push notifications to the simulator. Once you have it installed, sending a push notification is as simple as typing the following command:
poes send com.marc.PushTest
The cool thing about this tool is that you no longer need to worry about trying to format your JSON payload. Via the command line arguments, you can provide the text and body of your push notification. In the gif above, you can see that I‘m just using the default values provided by Poes for the body and title of the push notification.
I really like the simplicity and ease-of-use of Poes. For more information, check out the creator Antoine van der Lee’s blog—especially his post about using it for push notification testing.
Control Room
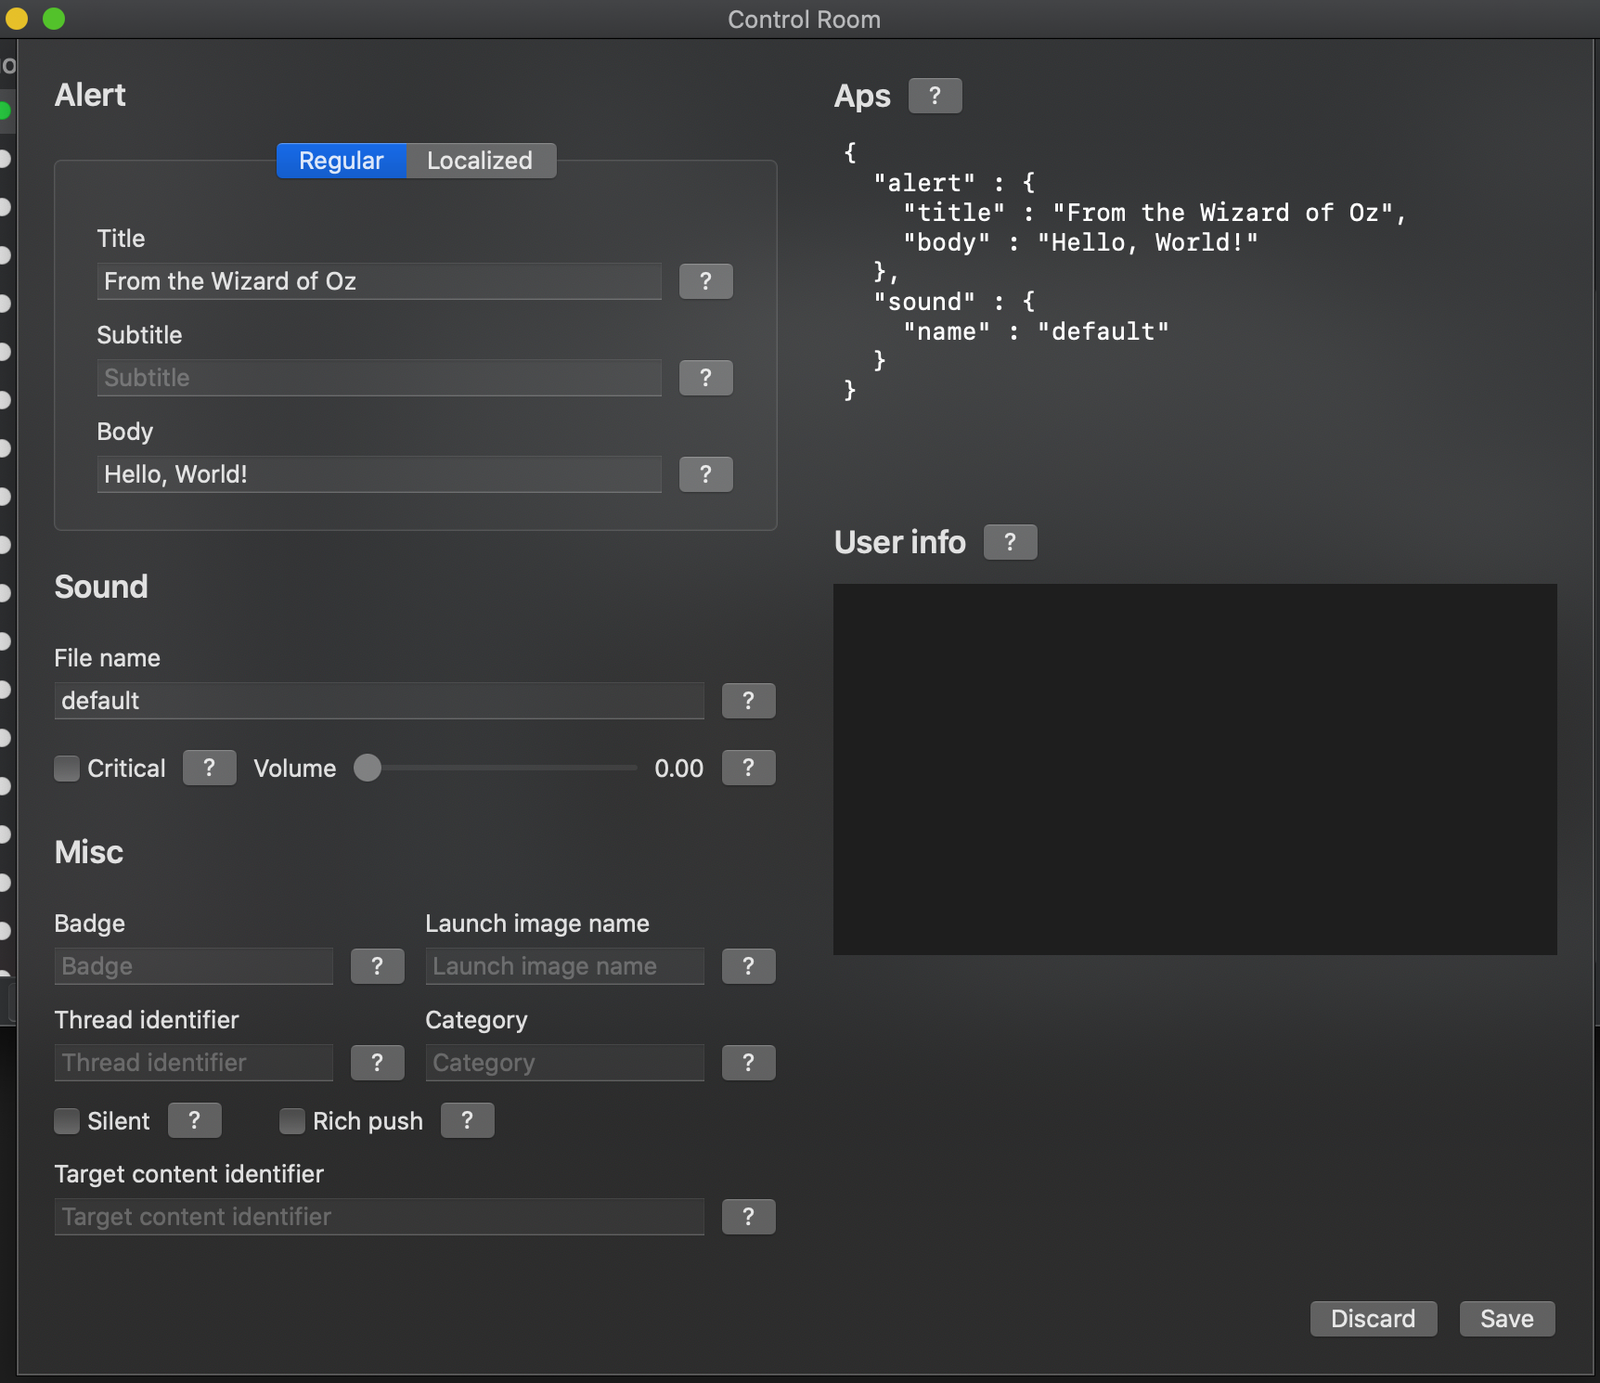
Control Room is the Tesla of tools at the moment, in my humble opinion. Control Room is a macOS app written by Paul Hudson that lets you control the UI appearance, status bar configuration, and more for iOS, tvOS, and watchOS simulators. It wraps Apple’s own simctl command-line tool, so you’ll need Xcode installed. The thing about this tool is that it serves multiple purposes, while also providing a notification editor that lets you build your notification payload.
To use Control Room, clone the GitHub repo to your PC and run the Xcode project. If you already have a simulator running, you can use the Default option to run your tests. Simply select your application‘s bundle identifier in the list of options and press the “Send Push Notification” button.
As you can see above, it’s really easy to send notifications using Control Room. If you press the “Open Notification Editor” button, you can customize your notifications further, including providing data for rich notifications. While these are all items you could do with Apple’s simctl command-line tool, Control Room allows you to do all of it in a GUI editor.
TL;DR
In this post, we created a basic project that we used to test remote notifications. We looked at the simplest path, which involved dragging an apns file onto our simulator without having to install any dependencies or use separate tools. This method works very well for quickly testing and does not require any specific tools or versions of macOS.
On the other hand, we also discussed Poes and Control Room as alternative tools for testing. Both of these tools are written in Swift which is another plus. Poes is a command-line tool that lets you send a push notification in one line via the terminal, and Control Room is a macOS app that lets you control your simulator in various ways while also doing things like sending a remote notification. In general, I really like this new feature in Xcode, and it can be used in all sorts of different scenarios.