Swift on Raspberry Pi Workshop: Part 2
Building Swift on a Raspberry Pi

This is the second post in a three-part series about setting up a Raspberry Pi to build a distance measurement system for an autonomous car. In Part 1, we set up a basic circuit to control LEDs via the Raspberry Pi. In this post, we‘ll cover how to create the external build system we need to build and transfer code from a computer to our Raspberry Pi and start writing some Swift.
Using Swift to control the LEDs
We’ve built our circuit and verified that everything is hooked up with the WiringPi library. This is nice, but wouldn’t it be even nicer to use Swift to control our circuit? To do that, we’ll need to first create an external build system, and then create a Swift executable package.
Creating an external build system
The external build system will help us transport and build our Swift package on the Raspberry Pi. In the past, I used Swish to sync my code to the Pi. Being that it is no longer maintained, it doesn‘t work quite right with the new structure of Swift packages. To help with this, I created a similar script using SPM called Xport.
We‘re going to use Xport to perform a rsync between our computer and the Pi—Xport uses SSH to establish a connection with the Pi, which requires us to provide a username and password every time we connect. Because we‘re using Xcode to execute this script, we’ll need to set up passwordless SSH access to create a trusted connection between our computer and the Pi. Here‘s what we need to do:
Step 2
- Launch Xcode and create a new project. I‘m going to call mine
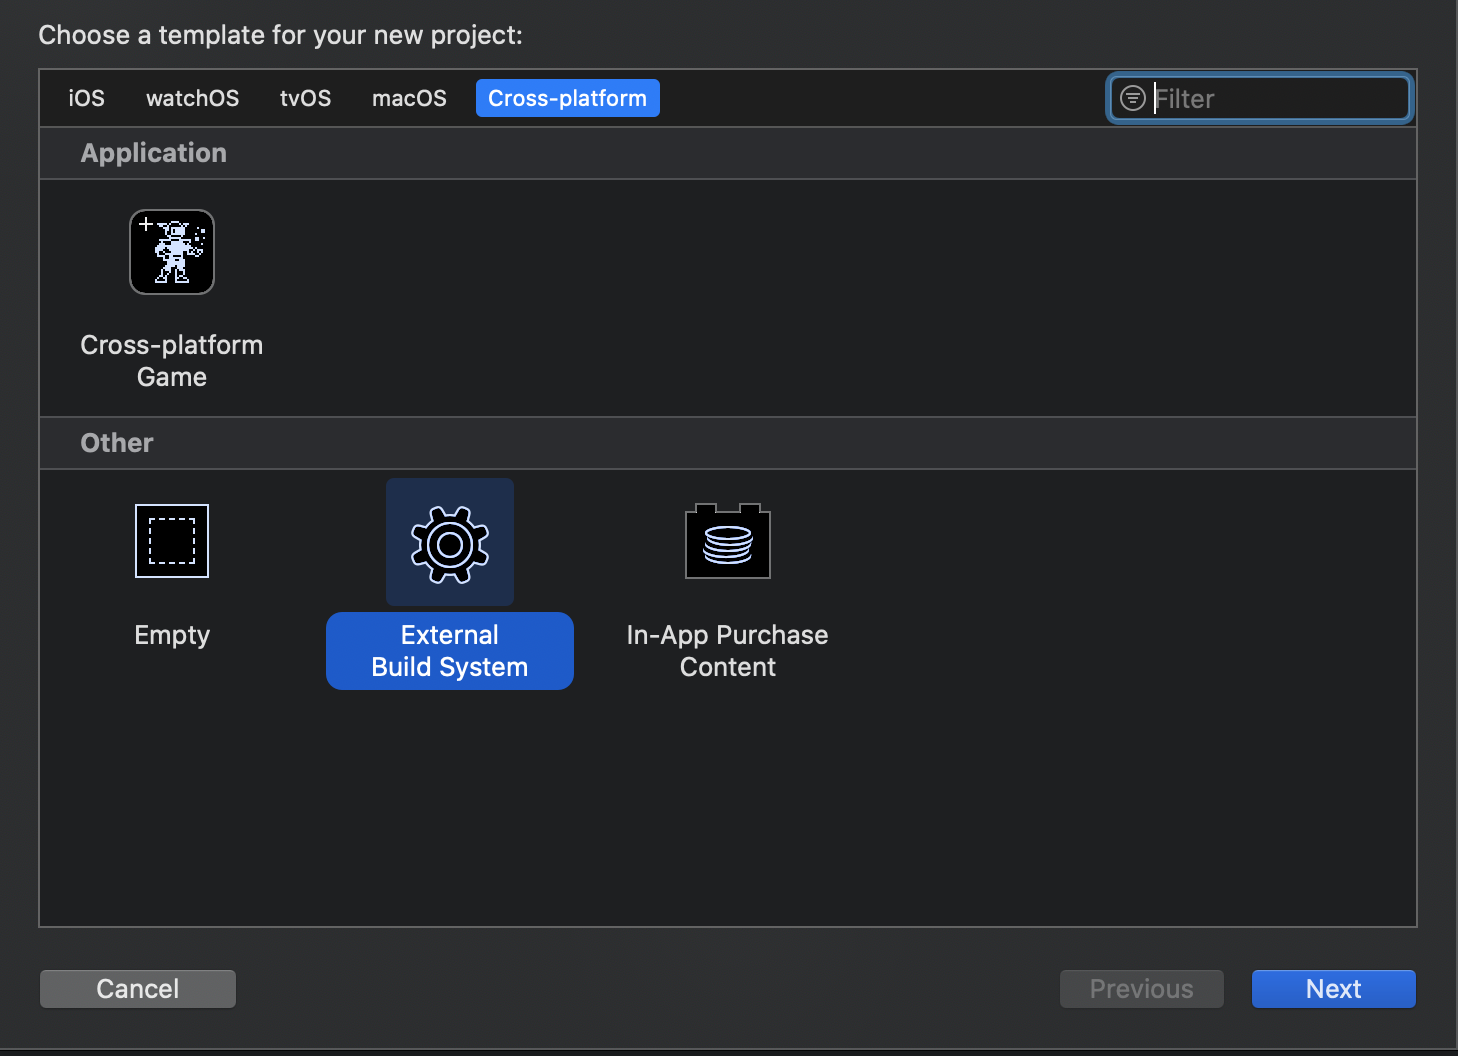
RemotePiBuild. Be sure not to use any spaces. - For the project template, select
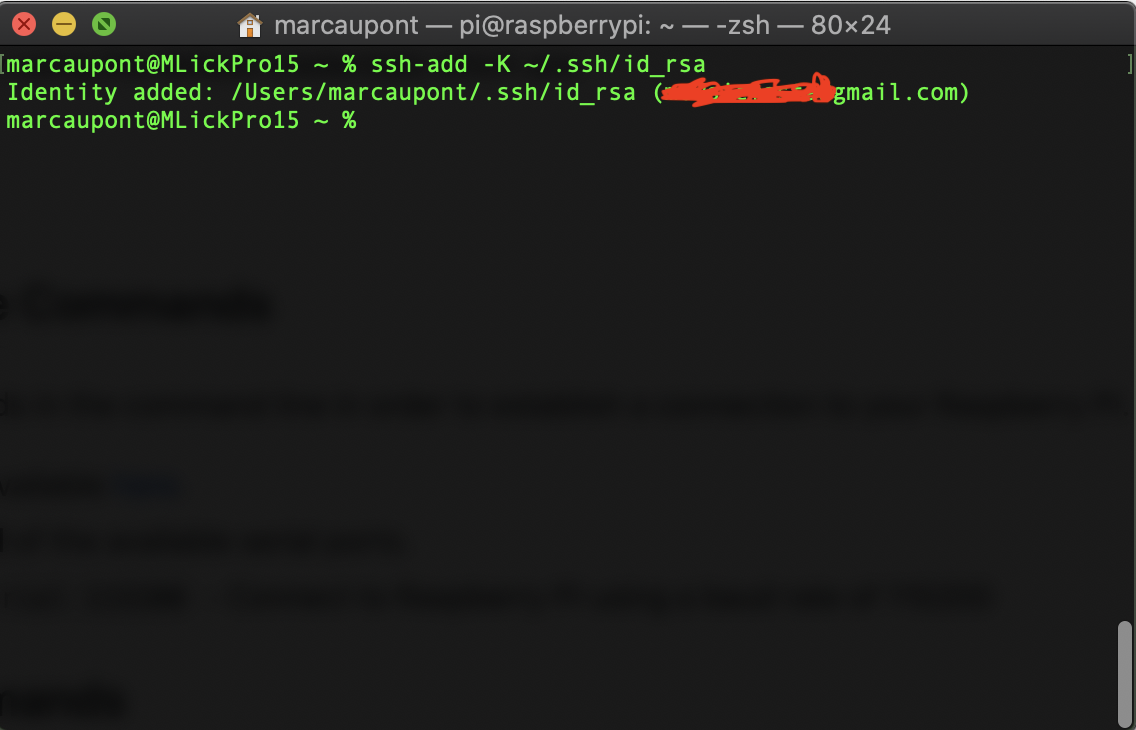
Cross-platformandExternal Build System. - Follow these instructions to set up passwordless SSH access. To ensure that it‘s set up properly, try to SSH into your Pi—if you’re still prompted to enter a password, you may need to store your RSA key to your keychain with this command:
ssh-add -K ~/.ssh/id_rsa - Once you‘re able to connect without entering a password, we can move on to creating our swift package and writing our Swift code!
Step 3
Creating the Swift executable package
We‘ve built the external build system that will sync and build our package to our Raspberry Pi, but we don’t have a package yet. That package is the Swift code that will be executed on the Pi to control our circuit.
To get started, we are going to make use of the Swift Package Manager to create our package. With Xcode 12, you can create one from Xcode and manage your dependencies from there. From within your project, go to the Xcode menu and select File, New, Swift Package.
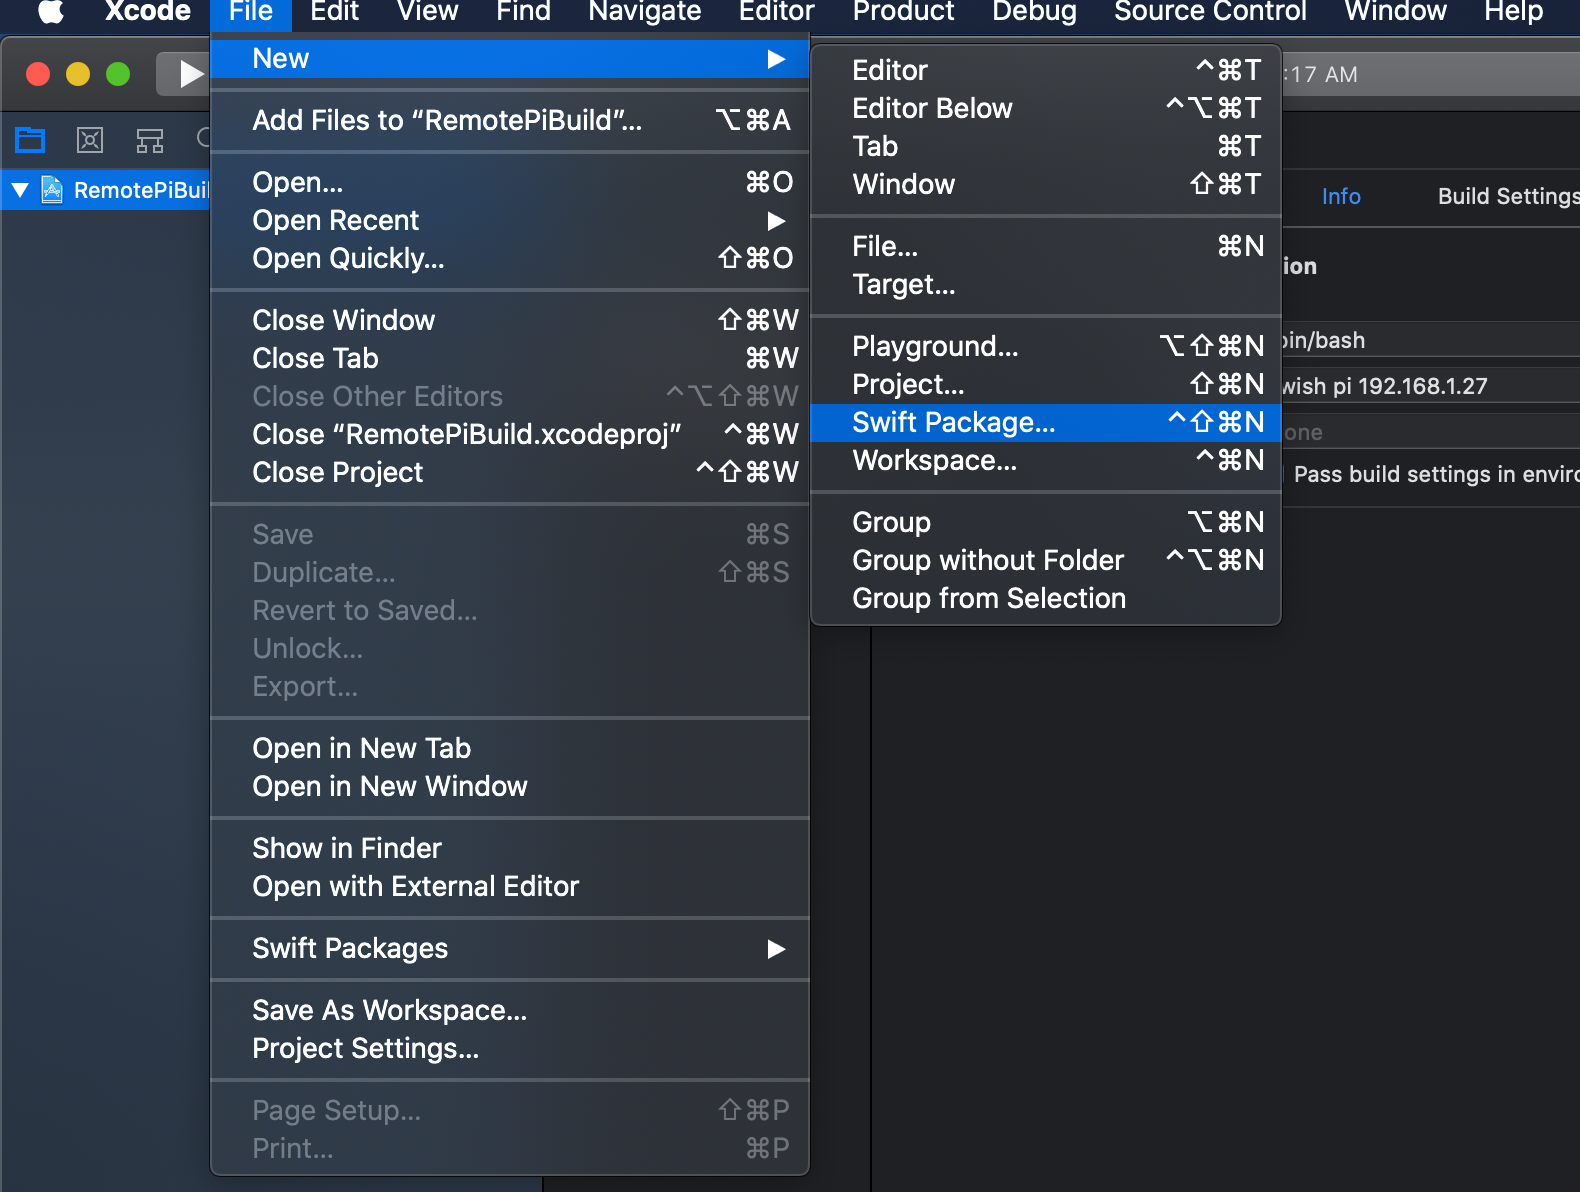
Once you have reached the screen below, give your package a name—I‘m going to call mine LEDControl. At the bottom of the screen, be sure to select your external build system project under the Add to section to ensure that your package is part of the build system project.

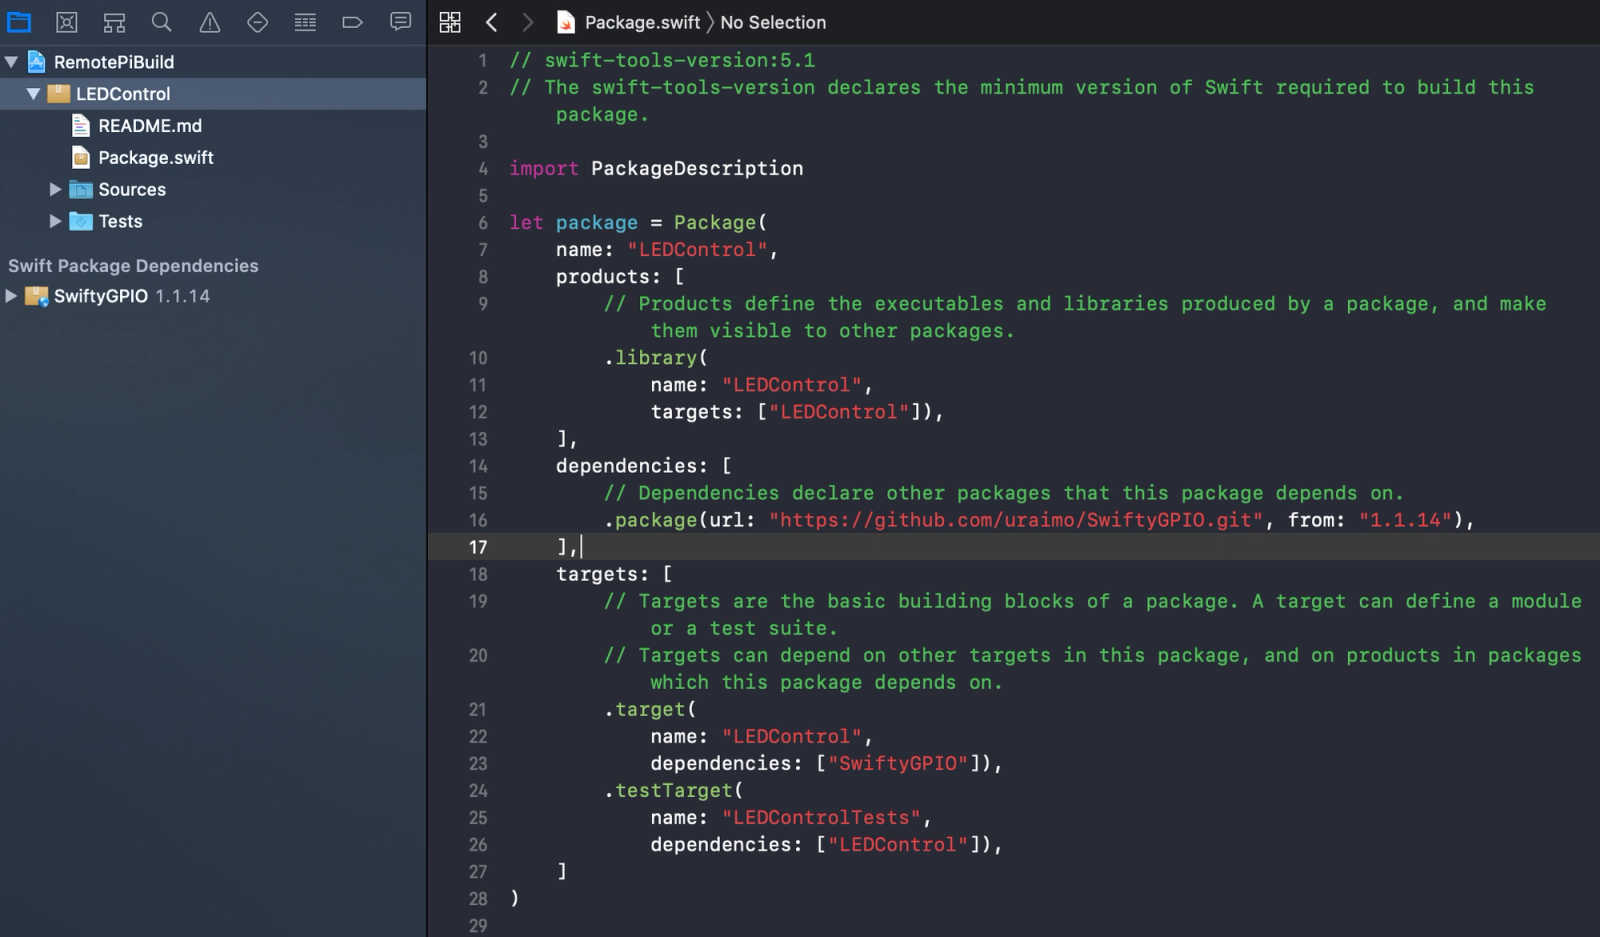
At this point, our project is created and we need to install our dependencies. We are going to use SwiftyGPIO to write the Swift code that controls our GPIO pins. Go to your Package.swift file, and add SwiftyGPIO. The result should look like this:
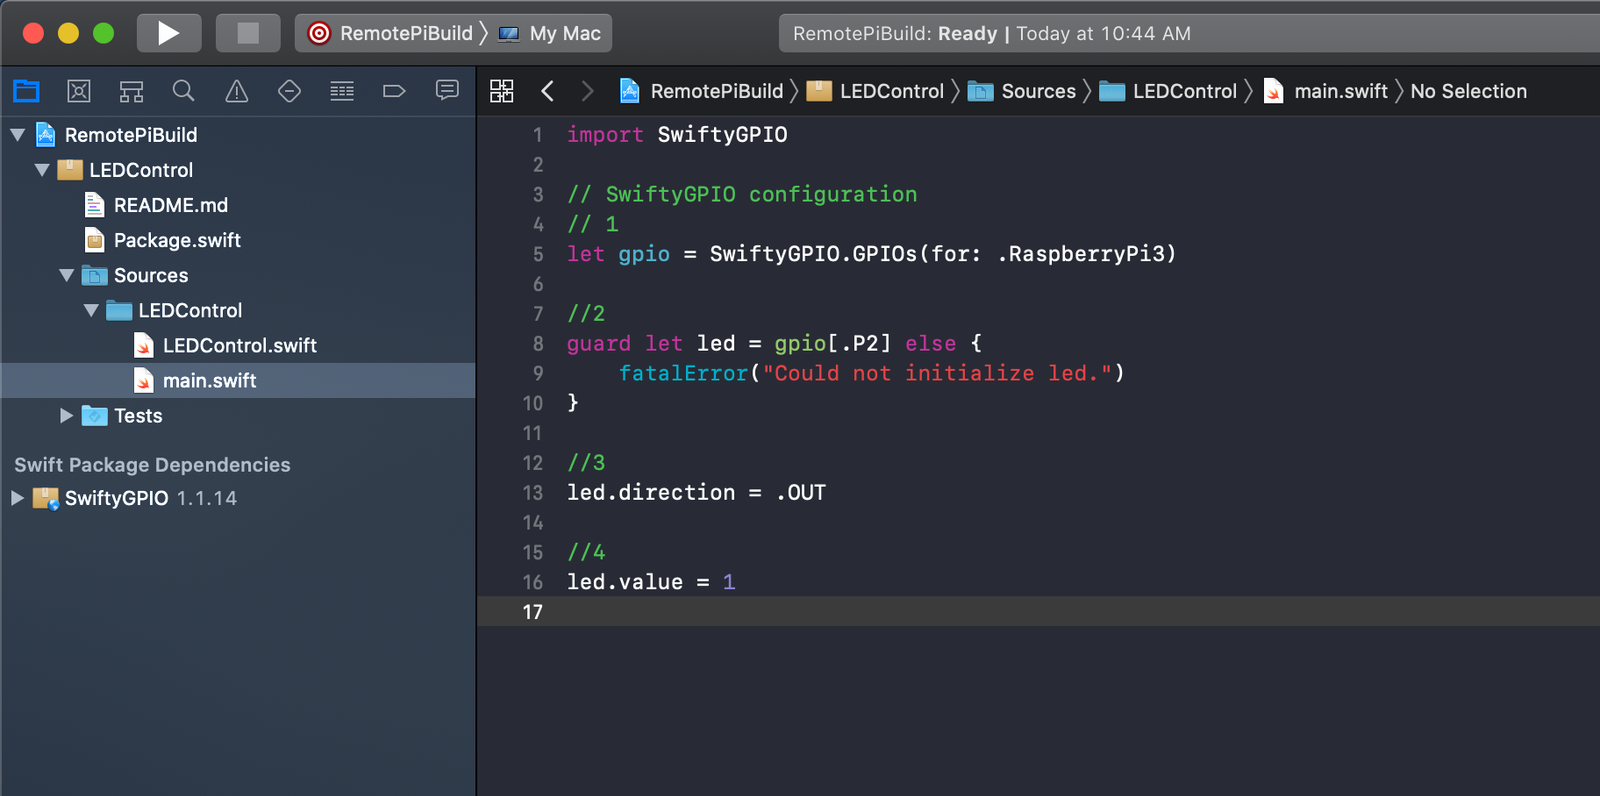
Now, let‘s add the code that is going to turn on our LED. In the Sources\LEDControl directory create a file called main.swift. Add the code in the photo below to the main.swift file:
- First, retrieve the list of GPIOs available on the board. In this particular case, I am using the Raspberry Pi 3, but multiple board types are supported.
- Once we have the list of GPIOs, we can get a reference to the ones we want to modify. In our case, we are interested in GPIO 2.
- The next step is to set the direction of our pin(s). In this scenario, we set the GPIO 2 pin as an output pin so we can emit a 3.3V signal from it. This is how we will power our LED.
- The final step is where we set the pin to high or (1). This turns on the LED.
Building the code
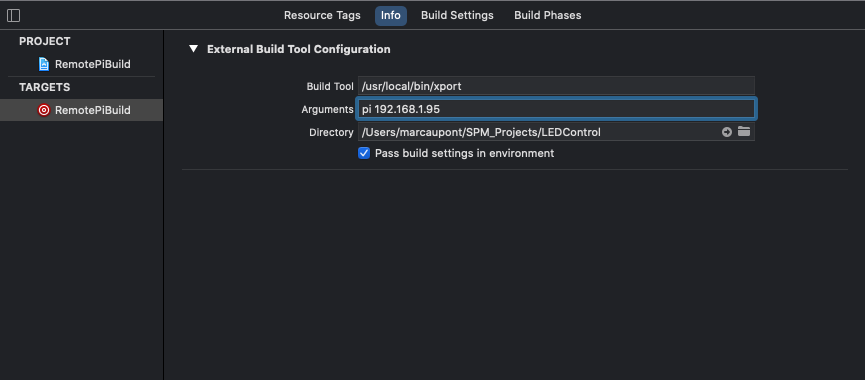
Now, we are ready to build and compile our code on the Raspberry Pi. This is where Xport is going to come in. Before we do this, lets complete the configuration of our build tool so that it can communicate with our Pi. Select the RemotePiBuild workspace and then the RemotePiBuild target. This will bring up the External Build Tool Configuration with a few fields to fill out. Here is how we will fill them out.
Build Tool – /usr/local/bin/xport. This is the path where Xport is installed.
Arguments – <username> <hostname>. The username value is the username from your Raspberry Pi. The default is pi. The hostname value is the IP address of your Pi.
Directory – This is the path for your Swift package.
Once you have correctly filled those fields with your information, press CMD + B to build the project and kick off the script responsible for transferring and building our newly created package on the Raspberry Pi. This script will copy over our package to the Xport folder on the Raspberry Pi. At the moment, it doesn‘t actually execute or run the script, so we will need to manually do that from our terminal window.
Go ahead and remote into your Raspberry Pi via the terminal with the command ssh <username>@<hostname>. From here, we‘ll navigate to the directory our project was transferred to. By default, Xport puts the completed project in ~Xport/<ProjectName>/ where ProjectName is the name of your external build system project. In my case, this is ~Xport/RemotePiBuild/. If I were to list all files in this directory via the ls command, I can see my actual Swift package, LEDControl.
Change into that directory with the command cd LEDControl. From this directory, we can type the swift run --skip-build command, which will build our project, download any dependencies, and execute our code. If all works well, your LED should be on!
If you want to turn the LED off, go back to Xcode, change the LED value to 0, and build the project. The build process will transfer our updated files to the Pi where we can repeat the steps above to execute the new code. From this exercise, you can see how to manipulate multiple components just by updating their values from 0 to 1. We will see more of this in the next post, when we work with our speaker and distance sensor.
What‘s next
So far, we‘ve learned how to configure our Raspberry Pi and build a small circuit on a breadboard. In Part 3 of this series, we‘ll integrate a speaker component, as well as the HC-SR04 sensor to measure distances.