Creating your first app shortcut
How to use Apple's new AppIntents framework

In iOS 16, Apple released the AppIntents framework to allow developers to more easily integrate their app actions with the system. App actions can be used in various parts of the system like the Shortcuts app, Siri, and Spotlight. Before the AppIntents framework was released, we used SiriKit to communicate our actions to the system — but this had a higher barrier to entry due to little documentation & resources.
One of my favorite features of creating app actions with AppIntents is the ease of prototyping. I can go from an idea to a functioning action in under an hour. With this guide, I‘ll walk you through how to create your first app action for the Shortcuts app.
Before we begin, let’s look at what we’ll need to do to create a simple shortcut:
- Conform to the
AppIntentprotocol. - Add a description
- Add your parameter(s)
- Handle user input in the perform method
Conform to the AppIntent protocol
Start by conforming to the AppIntents protocol. This can be done by giving the action a title, then adding the perform method.
import AppIntents

struct AddTaskIntent: AppIntent {

  static var title: LocalizedStringResource = "Add task"

  func perform() async throws -> some IntentResult {
    return .result()
  }
}
title: The title of the shortcut to be displayed in the shortcuts app. perform(): The perform method carries out the intent action. For example:
- It can carry out any persistence after you’ve acted on the input the user provides.
- It disambiguates responses to the user if the system finds ambiguity due to multiple values.
- It displays views which are shown to the user once an action has been carried out.
If you want to open the app once the action has been executed, set the openAppWhenRun property to true.
First task completed!
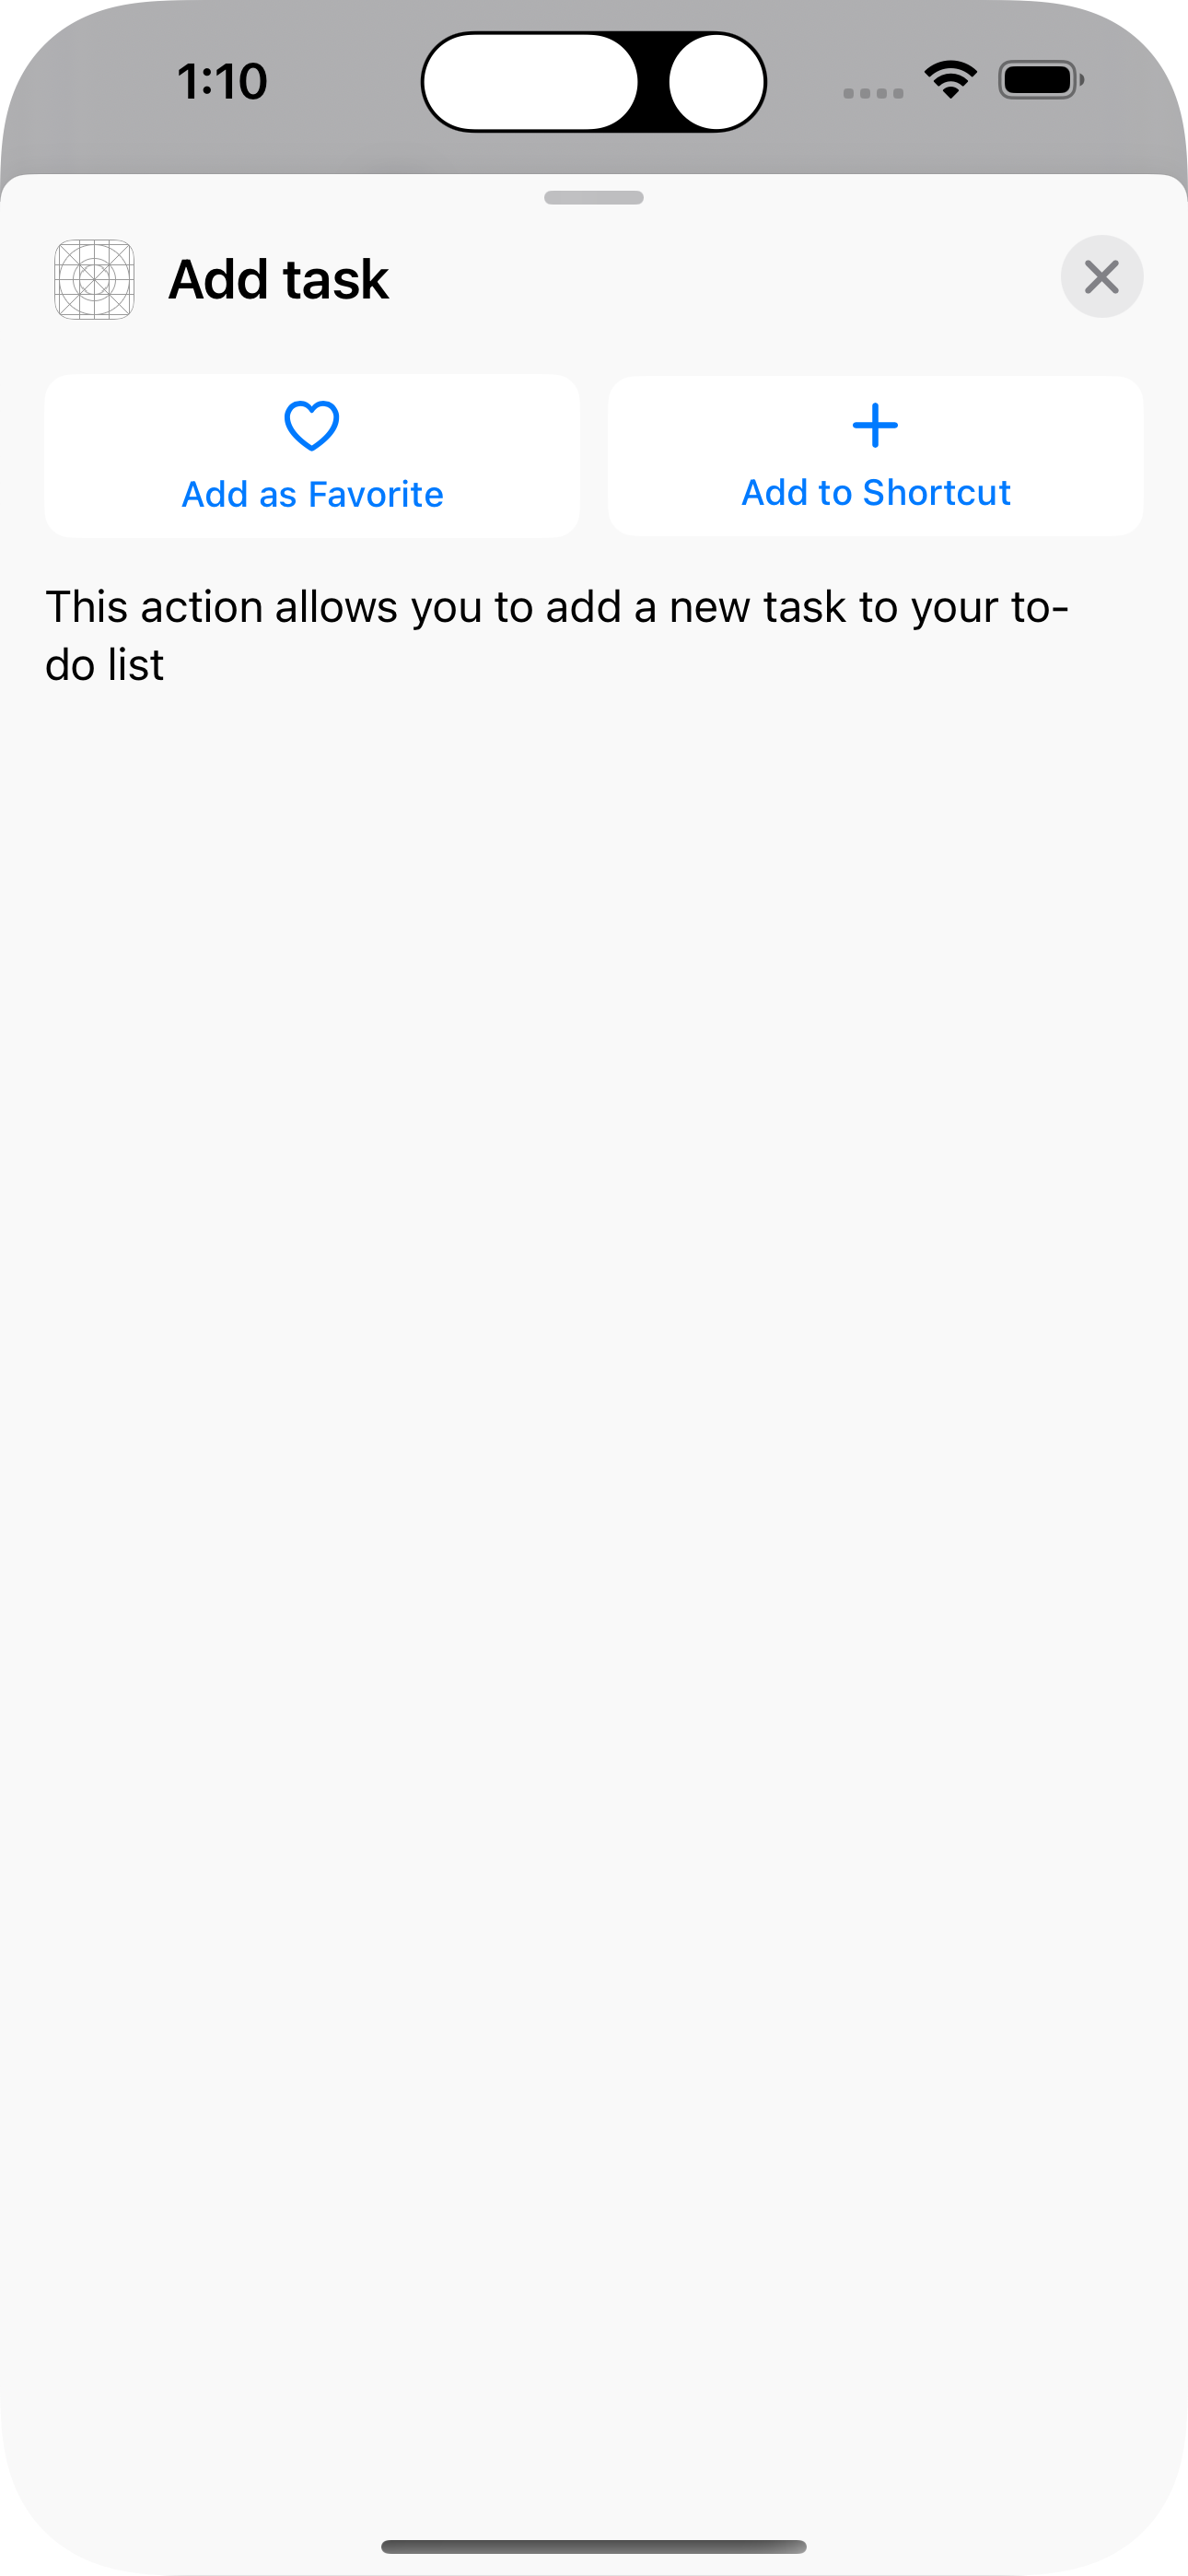
Add a description
A description describes the purpose of the intent — it is an optional property, but we‘re going to add one here as the next step.
import AppIntents

struct AddTaskIntent: AppIntent {

  static var title: LocalizedStringResource = "Add task"
  static var description: IntentDescription? = "This action allows you to add a new task to your to-do list "

  func perform() async throws -> some IntentResult {
    return .result()
  }
}
Add parameter(s)
In this example app, we want the user to add a task by typing it into a text box or speaking to Siri. To make that happen, we’ll add a parameter to capture user input. Parameters can take many types, from primitives to more complex types such as IntentPerson. For a comprehensive list of possible parameter types, refer to this documentation page.
import Foundation
import AppIntents

struct AddTaskIntent: AppIntent {

  @Parameter(title: "Task")
  var task: String

  static var title: LocalizedStringResource = "Add task"
  static var description: IntentDescription? = "This action allows you to add a new task to your to-do list "

  func perform() async throws -> some IntentResult {
    return .result()
  }
}
We can add other properties to the parameter property wrapper, such as:
descriptiondescribes what the property represents. The description added to your parameters will be displayed in the description of the app action.inputOptionsdescribes how we’d like the input to be styled when using the Shortcuts App. It has properties such askeyboardType,capitalizationType,multiline,autocorrectand others.requestValueDialogdescribes the exact phrase we’d like to be spoken in an audio context.requestDisambiguationDialogdescribes the phrase we’d like spoken in case of multiple values — to disambiguate between them, Siri will ask the user to choose between the various values.
Our parameter was added as a row below the title. We can make this nicer by adding a ParameterSummary. A ParameterSummary is a sentence that represents the intent and its parameters. Apple recommends that we provide parameter summaries to make the user interface more streamlined.
import Foundation
import AppIntents

struct AddTaskIntent: AppIntent {

  @Parameter(title: "Task")
  var task: String

  static var title: LocalizedStringResource = "Add task"
  static var description: IntentDescription? = "This action allows you to add a new task to your to-do list "

  static var parameterSummary: some ParameterSummary {
    Summary("Add \(\.$task)")
  }

  func perform() async throws -> some IntentResult {
    return .result()
  }
}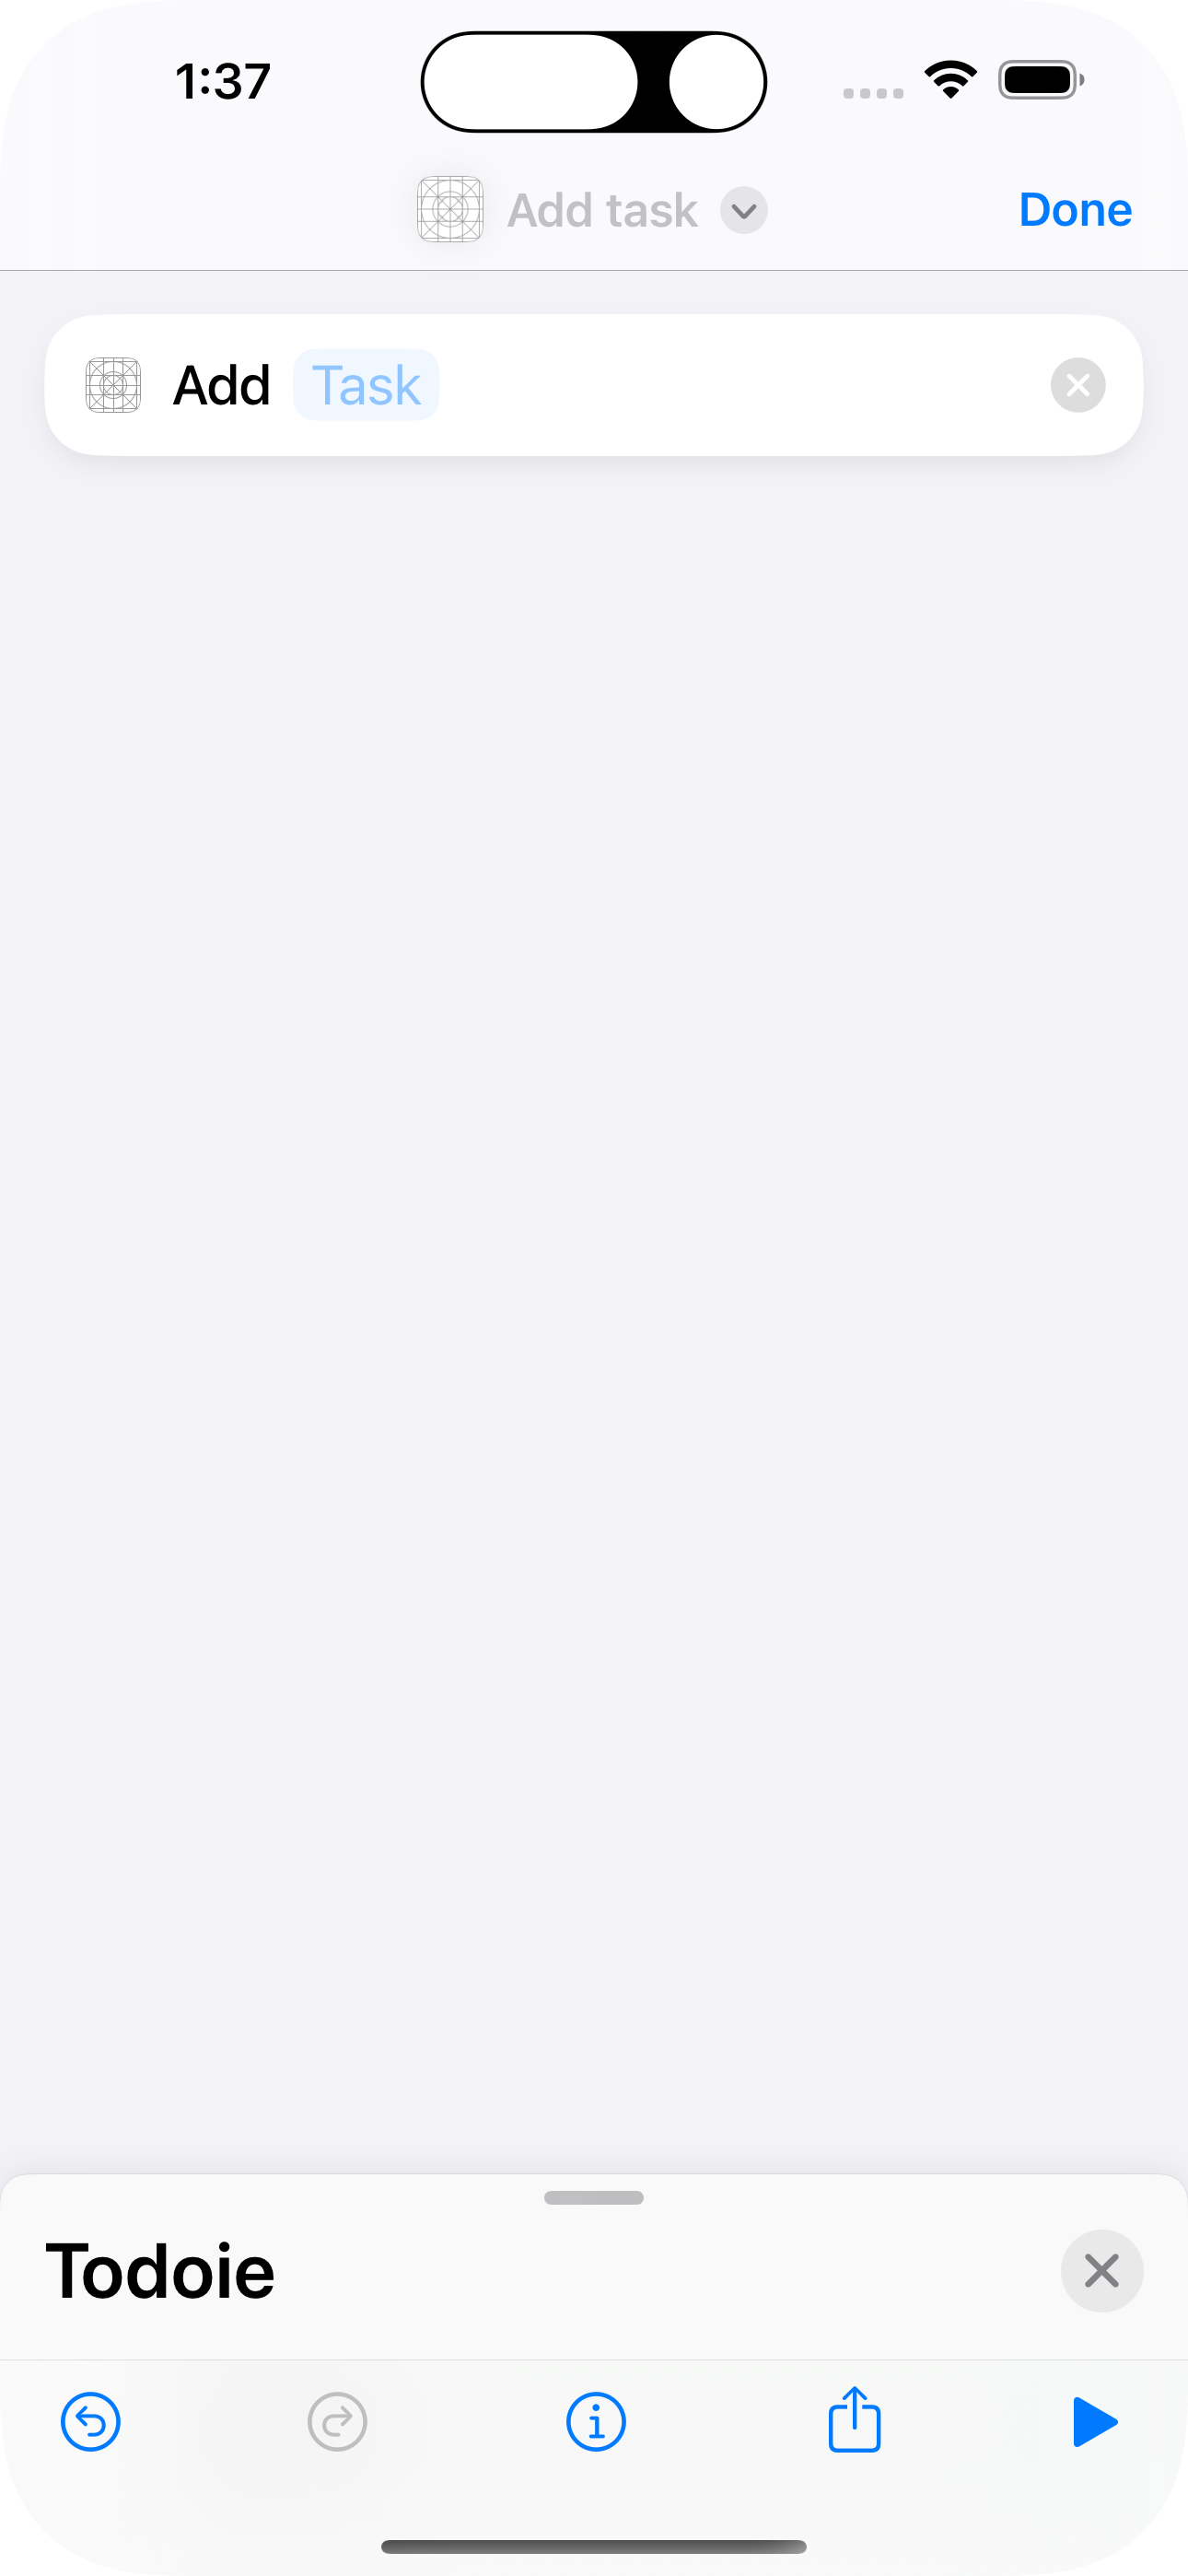
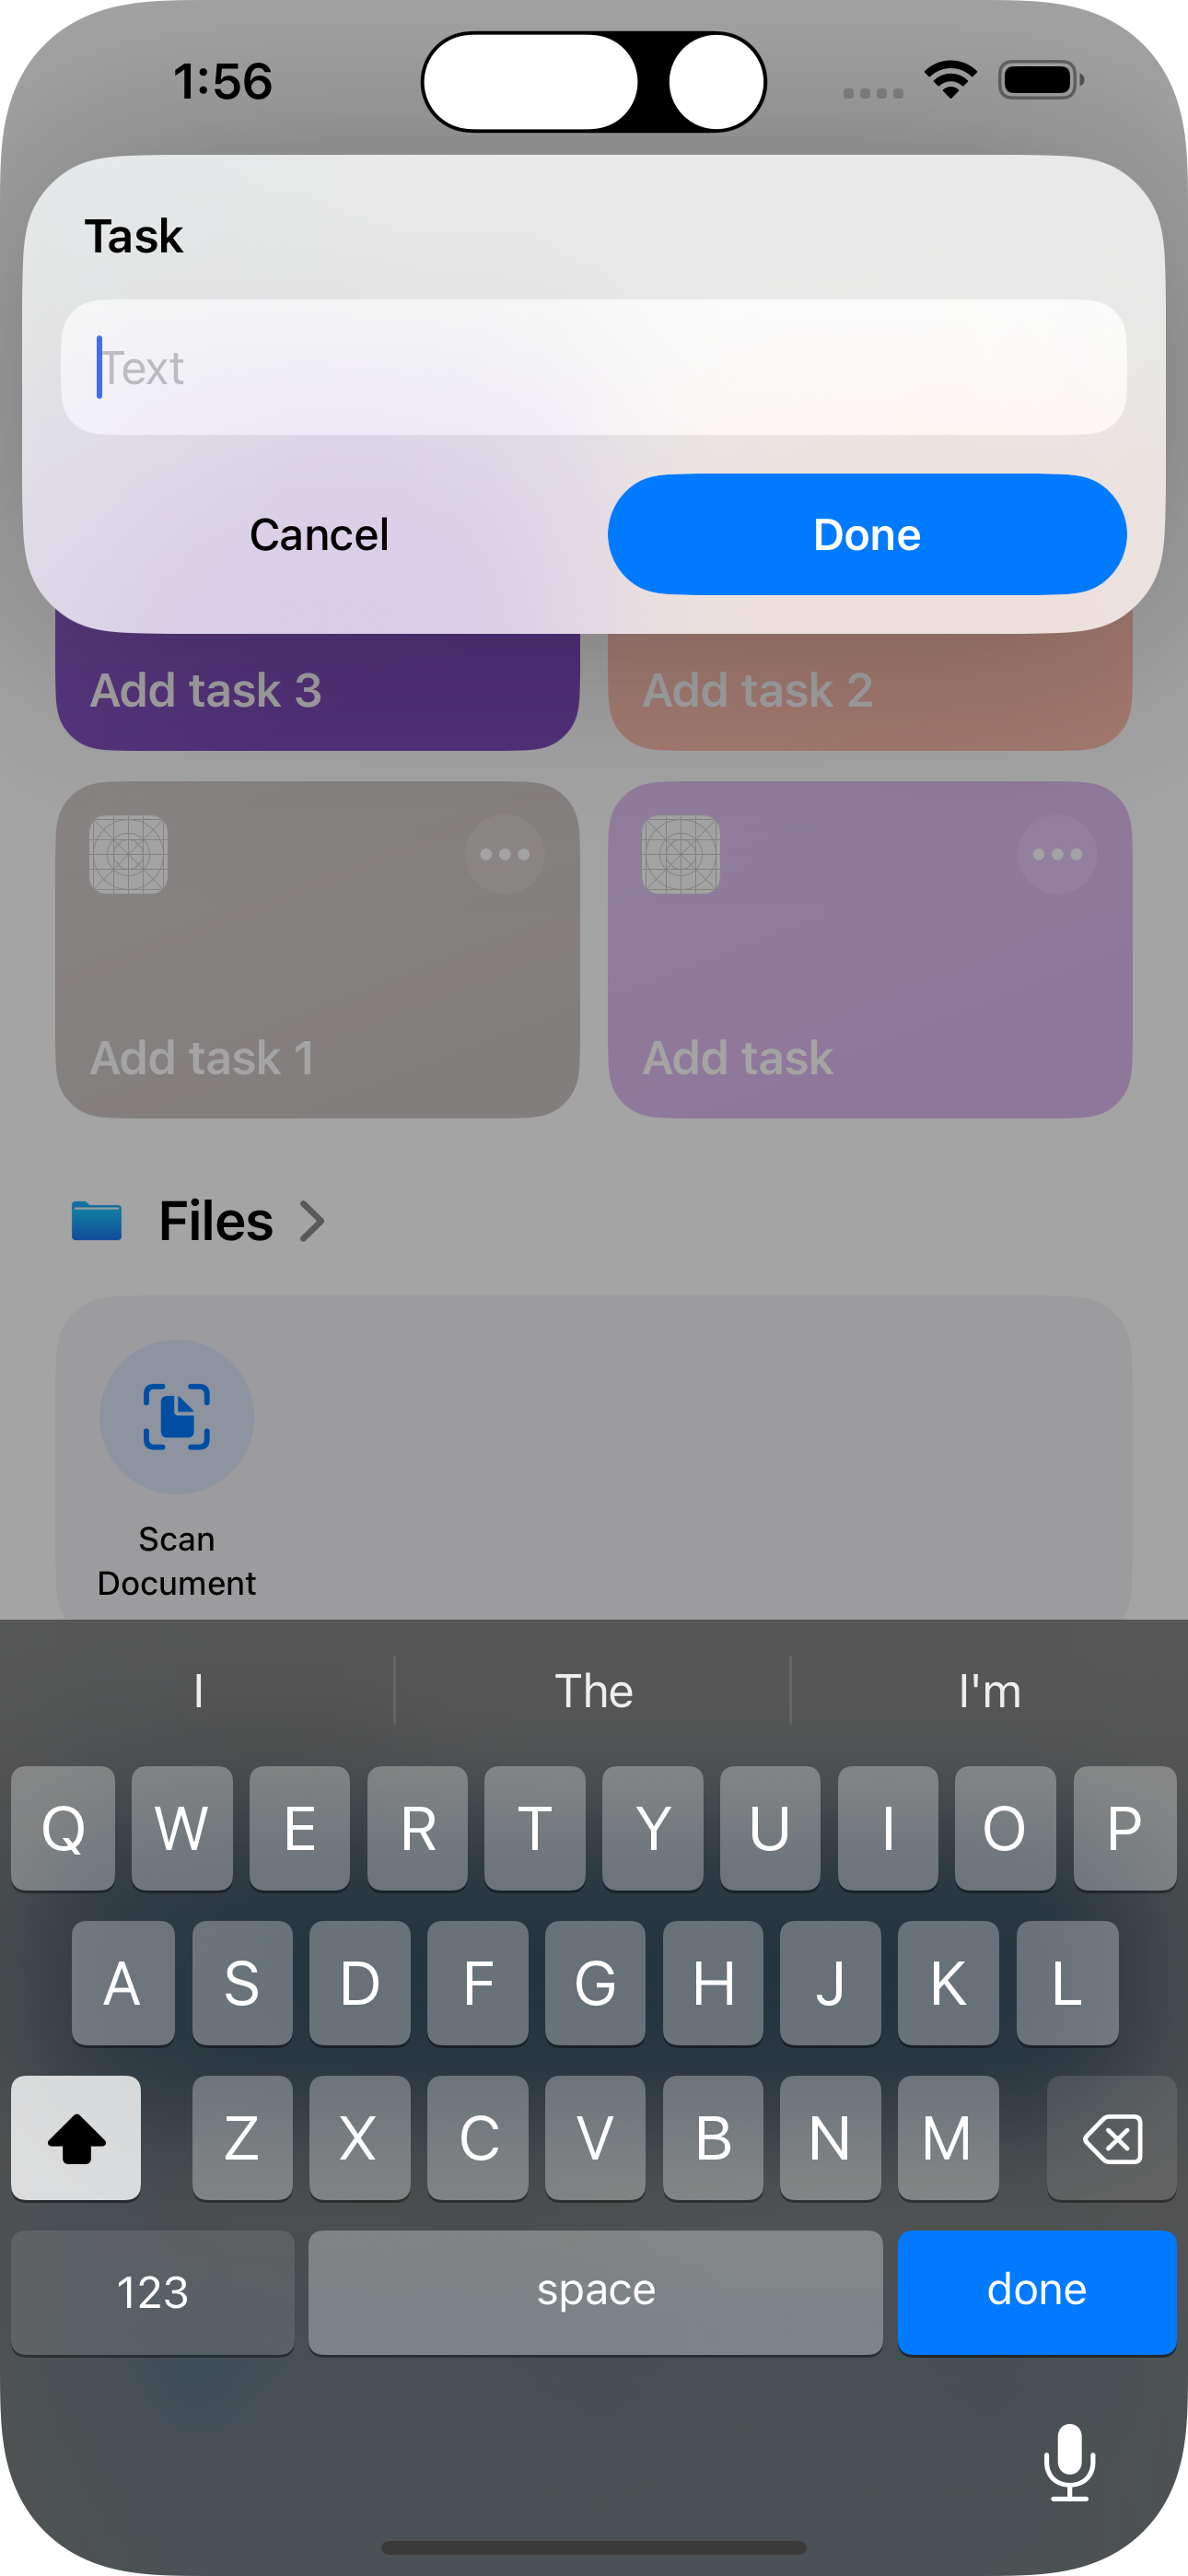
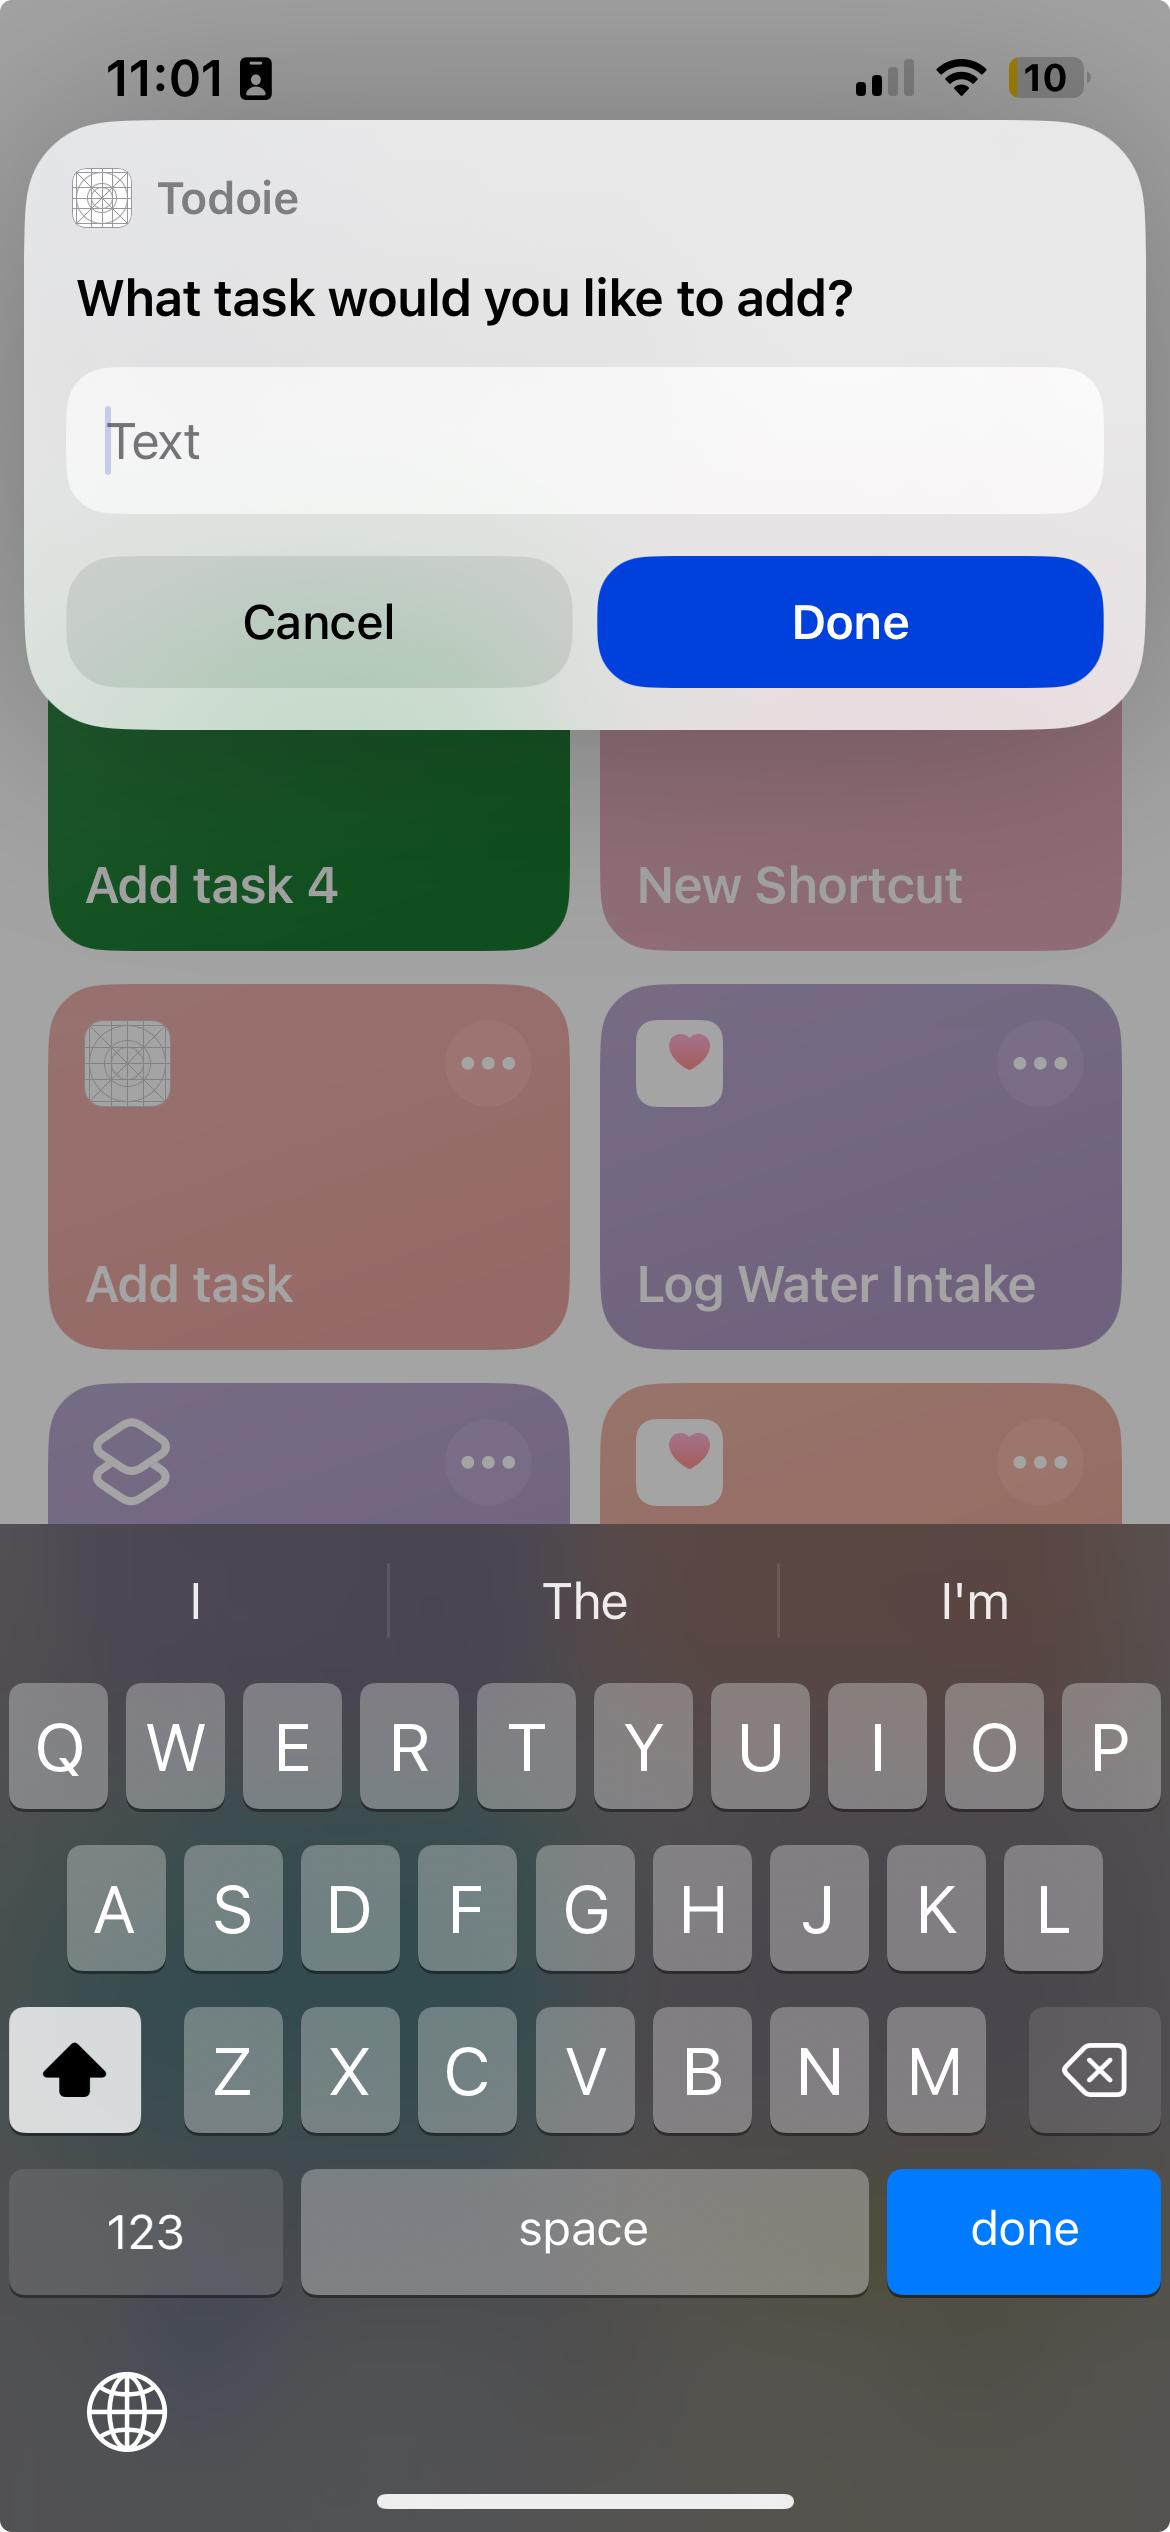
In this example, if you run the shortcut, a text field will be displayed. Tapping “done” dismisses it, but no further interaction occurs.
The system treats your parameter as required or not based on the inclusion of ?. If you don’t add a ? mark, the system prompts the user for input — with the ? mark, the system would continue the execution of the action. If you’d like to request a value for the parameter, use .needsValueError() with the dialog you’d like the system to use to prompt the user.
needsValueError(_:)Returns arestartPerformerror with context to request a value from the user for this parameter and re-perform the intent with the new values.
— Apple
import Foundation
import AppIntents

struct AddTaskIntent: AppIntent {

  @Parameter(title: "Task")
  var task: String

  static var title: LocalizedStringResource = "Add task"
  static var description: IntentDescription? = "This action allows you to add a new task to your to-do list "

  static var parameterSummary: some ParameterSummary {
    Summary("Add \(\.$task)")
  }

  func perform() async throws -> some IntentResult {
    guard !task.isEmpty else {
      throw $task.needsValueError("What task value would you like to add?")
    }
    return .result()
  }
}
Handle user input in the perform method
After establishing what user input you expect, you need to handle what happens when the action is performed.
In this example app, there is a need to persist the input in a task that will be stored locally on the device. In this perform method, the task is created and then persisted. Afterward, a Text view is displayed on successful persistence.
import Foundation
import AppIntents
import SwiftUI

struct AddTaskIntent: AppIntent {

  @Parameter(title: "Task")
  var task: String

  static var title: LocalizedStringResource = "Add task"
  static var description: IntentDescription? = "This action allows you to add a new task to your to-do list "

  static var parameterSummary: some ParameterSummary {
    Summary("Add \(\.$task)")
  }

  private let persistenceController: PersistenceController = .shared

  @MainActor
  func perform() async throws -> some ShowsSnippetView {
    try persistenceController.addTask(Task(title: task, createDate: .now))
    return .result(view: Text("Task added successfully"))
  }
}
The perform method is executed when the system has resolved all the parameters your code needs to successfully execute its functionality. When implementing logic in the perform method, the logic you add must perform the necessary work that returns the value to the system. This result could include a value that a shortcut can use in subsequent connected actions, dialogue to display or announce, and a SwiftUI snippet view, among other things. If it doesn’t make sense for your intent to return a concrete result, return .result() to tell the system the intent is complete.
If your intent manipulates the app’s user interface, annotate perform() with @MainActor to make sure the function executes on the main queue.
Apple
Note: When we are specifying values to return from the perform method:
- If you are returning a
SwiftUIView, specify your return type asShowsSnippetView. - If you are a returning value from the perform method, specify
ReturnsValue<T>, and specify the type you wish to return in parentheses. If you provide this value without the type, it will crash your app. - If you would like Siri to speak the output, return
ProvidesDialogspecifying what output Siri should speak. - If you want to return multiple types of output, specify each type separated by
&. For example:ShowsSnippetView & ProvidesDialog & ReturnsValue<T>.
Now that we‘ve completed all the steps, we have the scaffolding for an intent! Using this knowledge, we can also build more complex use cases — we’ll take a look at that in this post .