Useful tips for implementing TipKit
A new framework for teaching users about your app

With the launch of iOS 17, I was excited to take advantage of Apple‘s new framework TipKit, and it just so happened I need to implement an onboarding style tip system for a client at the same time. From everything I’ve learned so far, here are my 5 tips for using TipKit.
Tip 1: Customize TipView‘s background, corner radius, or image size
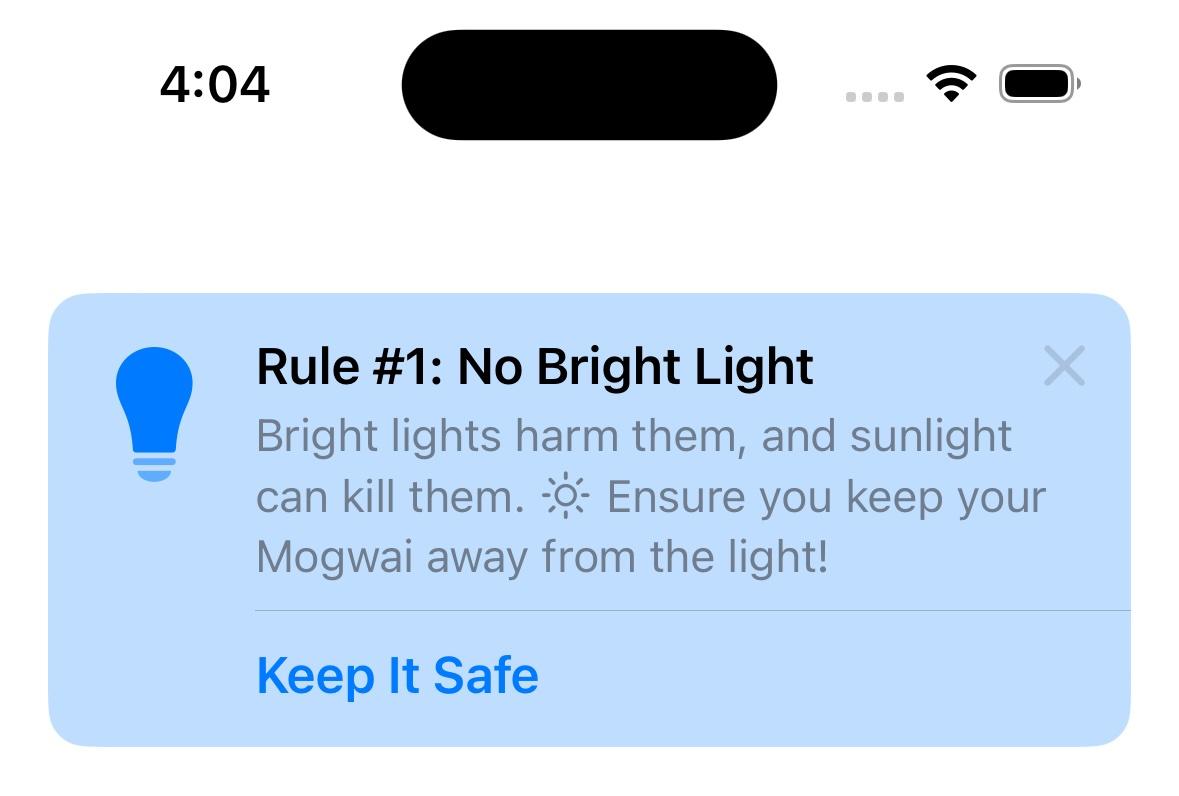
TipView has many of its own view modifiers for customizing how it displays. One of the first gotchas I ran into was trying to change the background color of an inline tip. Normally, you’d use a view modifier like .foregroundColor (which has been replaced by .foregroundStyle) to style the background. Unfortunately, that doesn’t seem to work here — I quickly discovered that you have to use .tipBackground or .tipViewStyle.
TipView(tip)
    .tipBackground(.blue.opacity(0.25))
As of right now, the tip specific view modifiers for TipView are: .tipImageSize, .tipCornerRadius, .tipBackground, and .tipViewStyle.
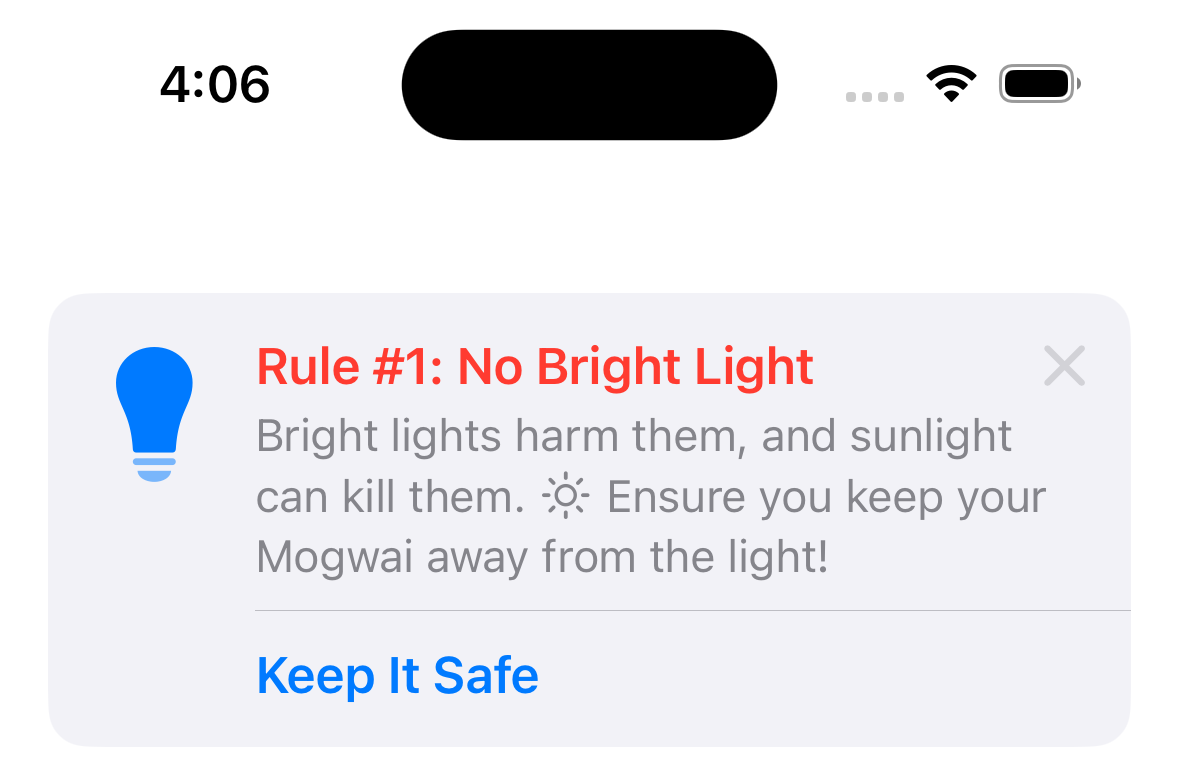
Tip 2: Customize the Text of the tip directly in the Tip itself
Interestingly enough, to customize things about the text of the tips, you apply the view modifiers directly to the Text that is returned as part of conforming to the Tip protocol. Any modifier that customizes Text while returning a Text will work here e.g. .foregroundStyle.
struct ExampleTip: Tip {
// MARK: - Tip
var title: Text {
Text("Here is a tip")
.foregroundStyle(.red)
}
var message: Text? {
Text("Tap \(Image(systemName: "ellipsis.circle")) to explore other ways to join.")
}
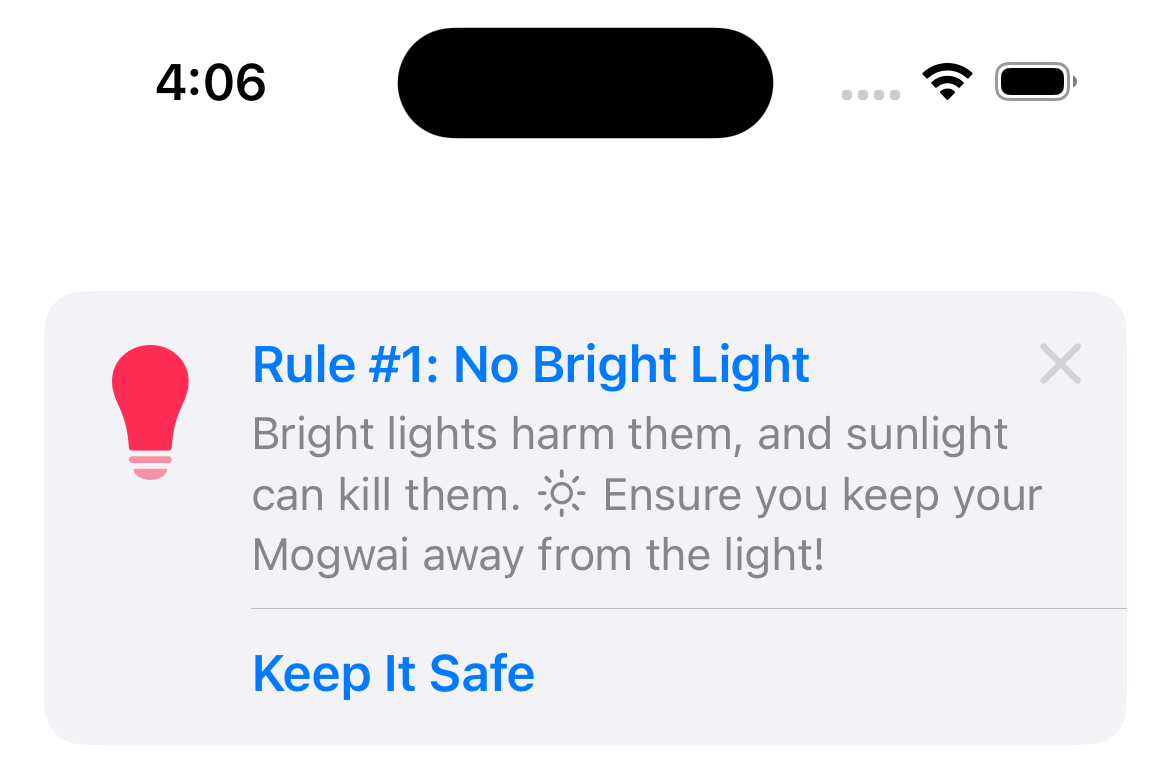
}Tip 3: Customize the Image of the tip with standard view modifiers
Unlike Text, in order to customize the color of the icon used in the TipView, you can use the common view modifiers like .tint.
TipView(tip)
    .tint(.pink)
Tip 4: You can only configure Tips.configure() once per life cycle
Apple has provided ways to tell TipKit to .showAllTipsForTesting(), .showTipsForTesting([ExampleTip.self, ExampleTip2.self]), .hideTipsForTesting([ExampleTip.self, ExampleTip2.self]), .hideAllTipsForTesting(), and .resetDatastore(). You need to call these before you call Tips.configure() — and based on the docs, you should call that on startup. From my tests, any additional calls after that first Tips.configure() will not result in changes.
struct TipDebuggingApp: App {

    var body: some Scene {
        WindowGroup {
            ContentView()
                .task {
                    try? Tips.resetDatastore()
                    try? Tips.configure()
                }
        }
    }
}
Tip 5: Build a debug or testing menu for tips in your app
In my specific use case, I needed to build a special debugging tips menu to allow testers to play with how the tips would appear in the app (e.g. inline vs. popover). It took me a couple tries to get this working well.
I found it more reliable to call Tips.resetDatastore() instead of trying to show and hide specific tips with .showTipsForTesting([ExampleTip.self, ExampleTip2.self]) and .hideTipsForTesting([ExampleTip.self, ExampleTip2.self]).
struct TipDebuggingApp: App {

    var body: some Scene {
        WindowGroup {
            ContentView()
                .task {
                    try? Tips.resetDatastore()
                    try? Tips.configure()
                }
        }
    }
}
I then set up a view that would allow you to select which tip would be shown, and whether it‘s shown inline or as a popover.
struct TipDebugView: View {
    @AppStorage(AppStorageKey.showTipsInPopover) private var showTipsInPopover: Bool = false
    @State private var selection: Set<String> = []

    private let tips: [any Tip] = [ExampleTip(), ExampleTip2(), ExampleTip3()]

    var body: some View {
        VStack {
            List(tips, id: \.id, selection: $selection) { tip in
                tip.title
            }
            .environment(\.editMode, .constant(EditMode.active))
            .navigationTitle("Tips")
            .onChange(of: selection) { _, newValue in
                UserDefaults.standard.set(Array(newValue), forKey: AppStorageKey.selectedTips)
            }
            .onAppear {
                if let selection = UserDefaults.standard.value(forKey: AppStorageKey.selectedTips) as? [String] {
                    self.selection = Set(selection)
                }
            }

            Toggle(isOn: $showTipsInPopover) {
                Text("Display relevant tips as popovers?")
                    .bold()
            }
            .padding(.horizontal, Grid.medium)

            Spacer()
            Spacer()
        }
        .background(Color(uiColor: .systemGroupedBackground))
    }
}
Because I used Tips.resetDatastore(), any and all of my tips would show if they didn‘t have a rule customizing how they’re presented. I did want this behavior for testing, but only when a tip was selected. The solution for this is uglier code than I would have liked, but it work well from a user standpoint.
let tipSelections = UserDefaults.standard.value(forKey: AppStorageKey.selectedTips) as? [String]

if !showTipsInPopover {
    let tip1 = ExampleTip1()

    if tipSelections?.contains(where: { $0 == tip1.id }) == true {
        TipView(tip1)
    }
}let tipSelections = UserDefaults.standard.value(forKey: AppStorageKey.selectedTips) as? [String]
let tip1 = ExampleTip()
if UserDefaults.standard.bool(forKey: AppStorageKey.showTipsInPopover), tipSelections?.contains(where: { $0 == tip1.id }) == true {
Button("Example button") {
// I perform some action.
}
.popoverTip(tip)
} else {
Button("Example button") {
// I perform some action.
}
}I’ve provided a sample project of the debugging menu here, along with a video of the debugging.
I also found a couple of good examples from Jordi Bruin‘sTipKit-Examples repo, which is more up to date than Apple‘s own sample project.